How can I backup my Hyper-V virtual machines using Online Backup?
To backup your Hyper-V virtual machines,
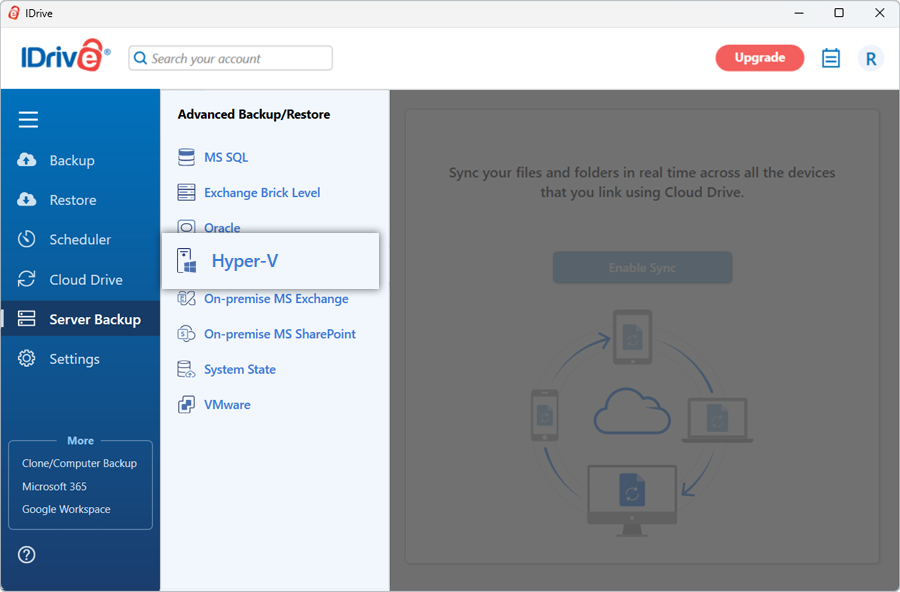
Sign in to the IDrive application and click 'Server Backup'. A slider menu will appear.
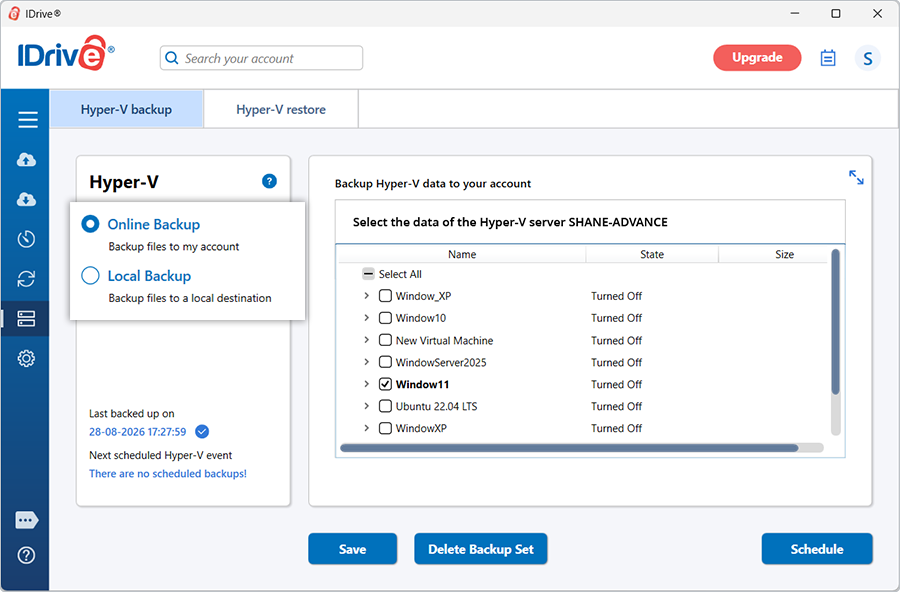
Click 'Hyper-V'. The Hyper-V backup/restore console appears. By default, 'Hyper-V backup' is selected.
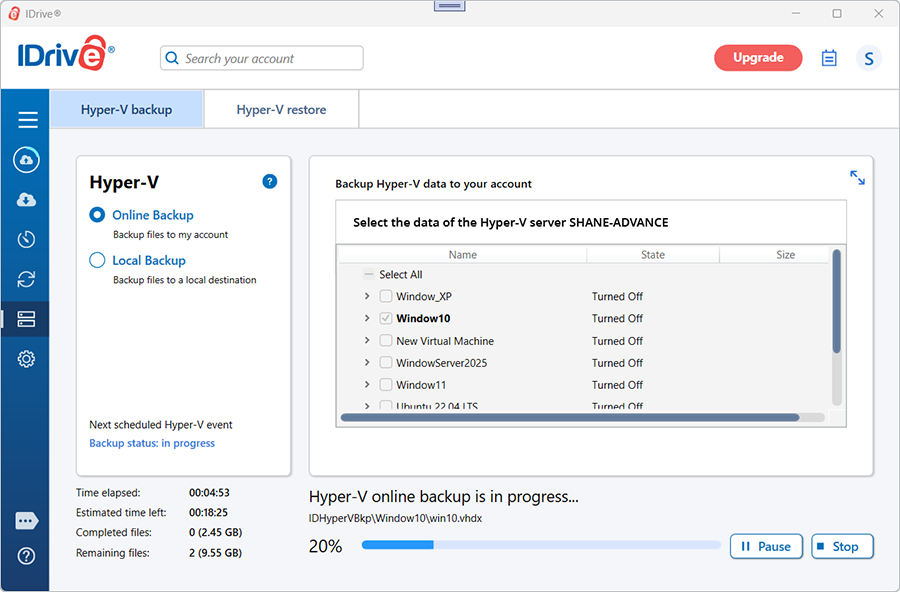
Select 'Online Backup'.
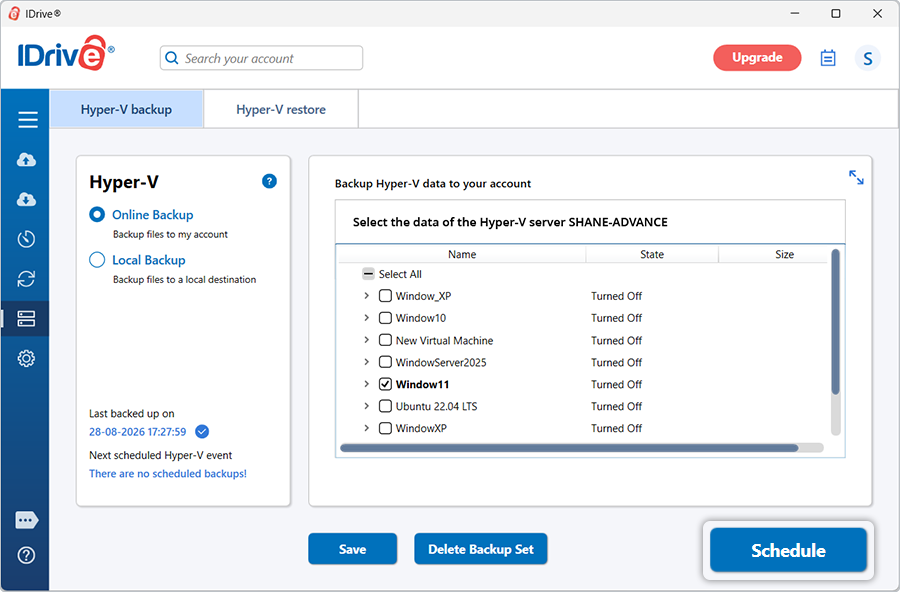
Select the virtual machines from the list.
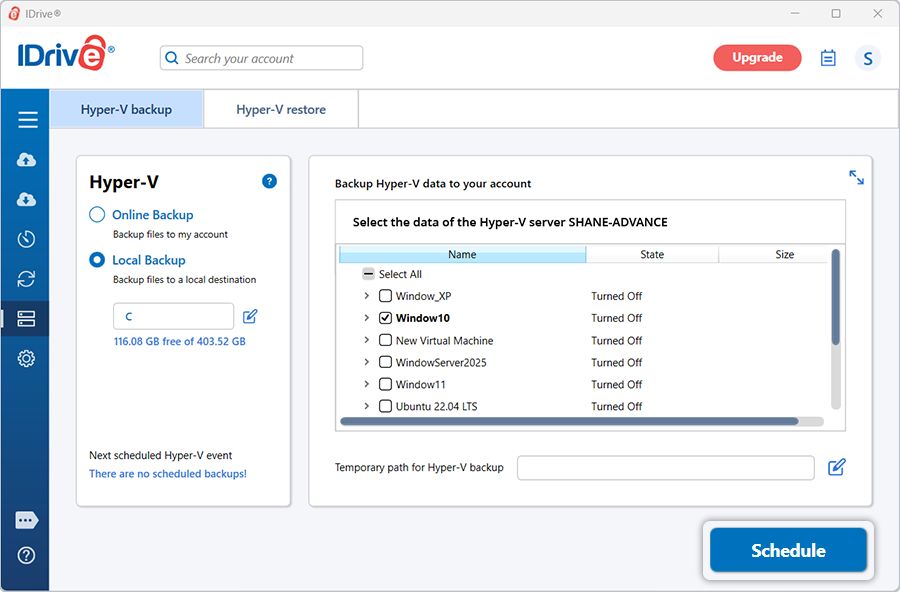
Click 'Schedule'.
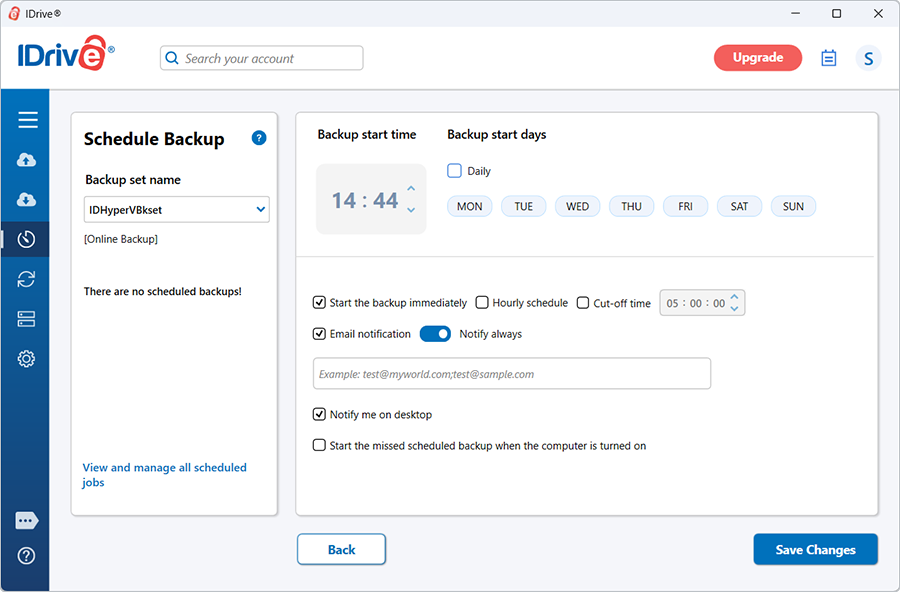
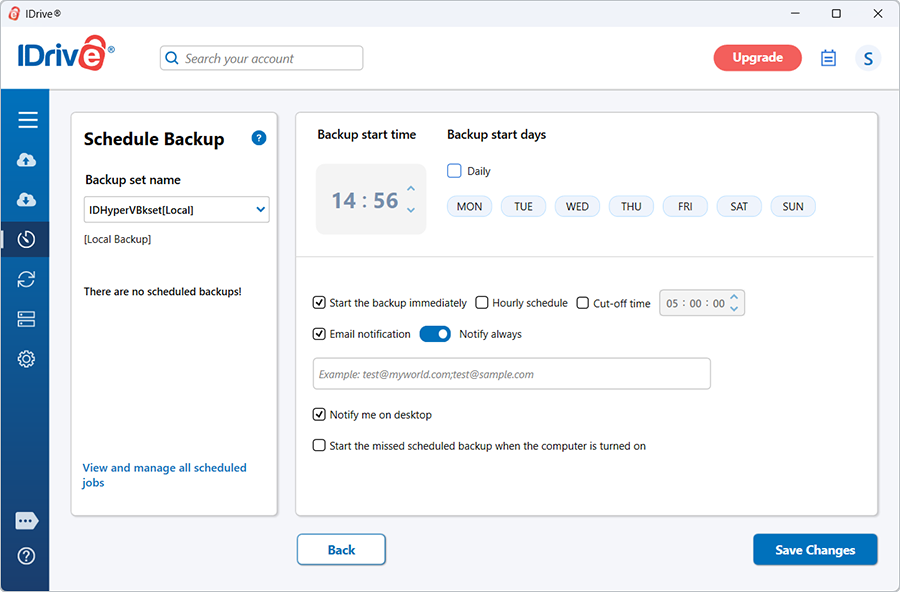
The 'Scheduler' is displayed where you can schedule the backup for any future day and time or perform an immediate backup of the selected virtual machines.
The backup progress will be displayed on the screen.
How do I backup virtual machines to the Hyper-V Server using Local Backup?
To backup your Hyper-V virtual machines,
Sign in to the IDrive application and click 'Server Backup'. A slider menu will appear.
Click ‘Hyper-V’. The Hyper-V backup/restore console appears. By default, ‘Hyper-V backup’ is selected.
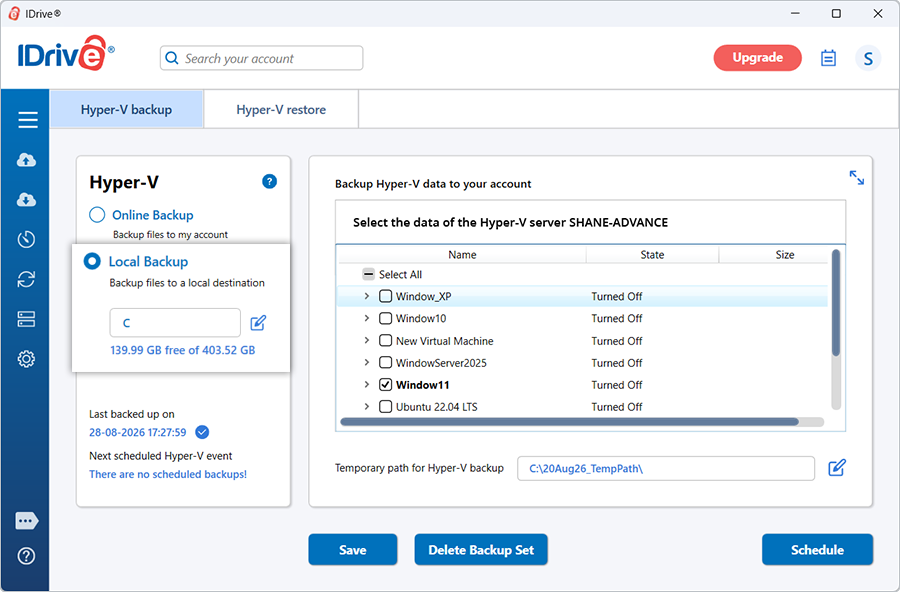
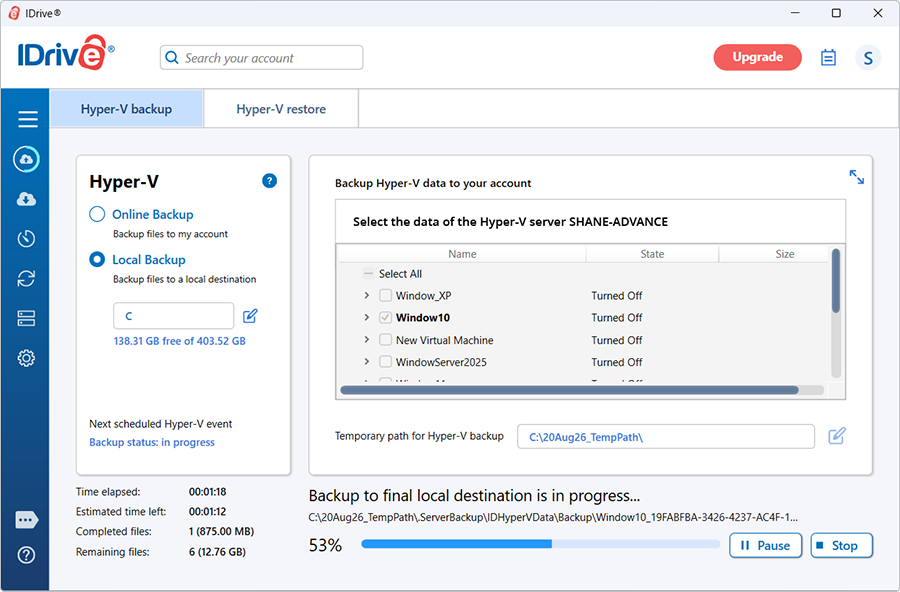
Select 'Local Backup'.
Note: On selecting ‘Local Backup’ the data will be stored in the local drive.
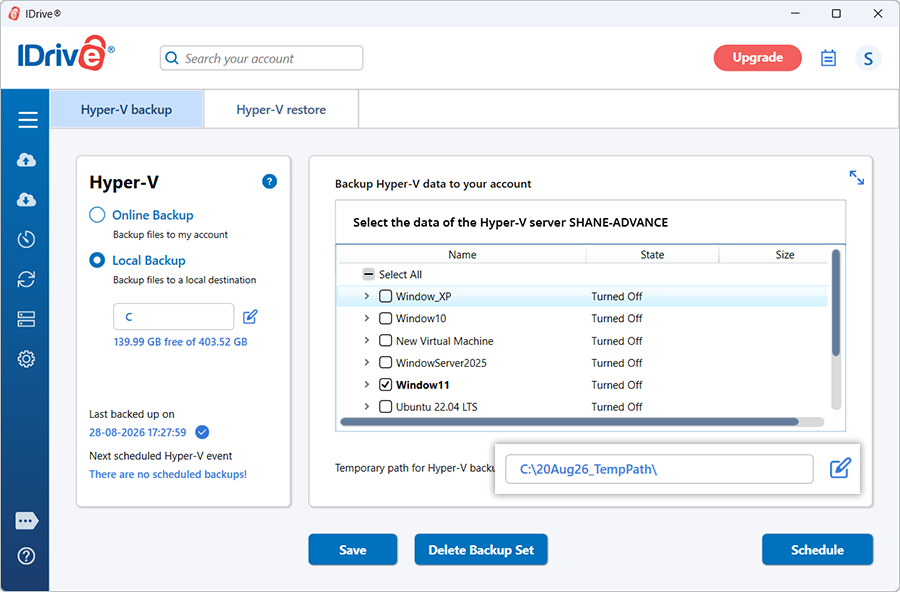
Select the virtual machines from the list and specify a temporary path for the local backup.
Note: For Local Backup, specify a temporary path. (Once Local Backup is initiated, the ‘IDHyperVData’’ folder is automatically created).
Click 'Schedule'.
The 'Scheduler’ is displayed where you can schedule the backup for any future day and time or perform an immediate backup of the selected virtual machines.
The backup progress will be displayed on the screen.
Does IDrive support incremental backups for Hyper-V virtual machines?
Yes, for Hyper-V configuration version 8.0 or later, IDrive supports incremental backups after the initial full online backup. This ensures optimal use of Internet bandwidth and storage space.
Can I backup Hyper-V virtual machines to a network-mapped drive or NAS drive?
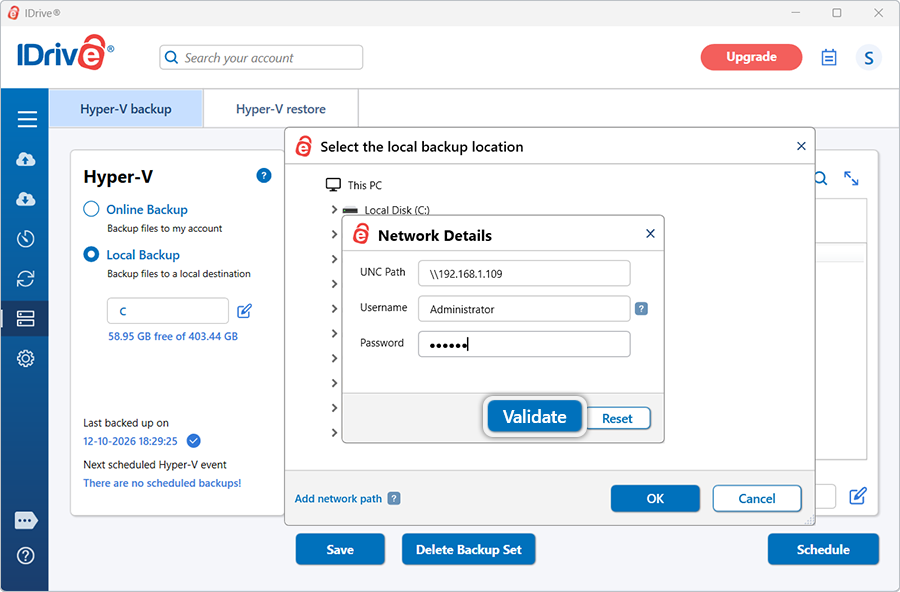
Yes, you can backup Hyper-V virtual machines to a network mapped drive or NAS drive. While choosing a local backup path, select the network mapped drive / NAS drive and provide the necessary authentication.
To backup your Hyper-V virtual machines to a network mapped / NAS drive,
Sign in to the IDrive application and click 'Server Backup'.
Click 'Hyper-V'. The Hyper-V backup/restore console appears. By default, 'Hyper-V backup' is selected.
Select 'Local Backup'.
Select the virtual machines from the list.
Note: For Local Backup, specify a temporary path. (Once Local Backup is initiated, the ‘IDHyperVData’’ folder is automatically created).
Select the network mapped drive/NAS drive as the location for creating the virtual machine backup and click 'Schedule'.
Enter your username and password to authenticate the network mapped drive / NAS drive and click 'Validate'.
The 'Scheduler' appears where you can schedule the backup for any future day and time or perform an immediate backup of the selected virtual machines.
Do I need to turn off or shutdown the virtual machines in Hyper-V manager to take a backup?
No. You do not have to shut down your active virtual machines to perform a backup. IDrive enables you to backup virtual machines in their Running state.
How secure is the data transfer during backup/restore using IDrive Hyper-V backup?
IDrive uses military-grade 256-bit AES encryption to encrypt all data transferred during a backup/restore operation using IDrive Hyper-V backup feature.
How do I restore virtual machines to the Hyper-V Server using Online Restore?
To restore a virtual machine to the Hyper-V server using online restore,
Sign in to the IDrive application and click 'Server Backup'.
Click 'Hyper-V'. The Hyper-V backup/restore console appears.
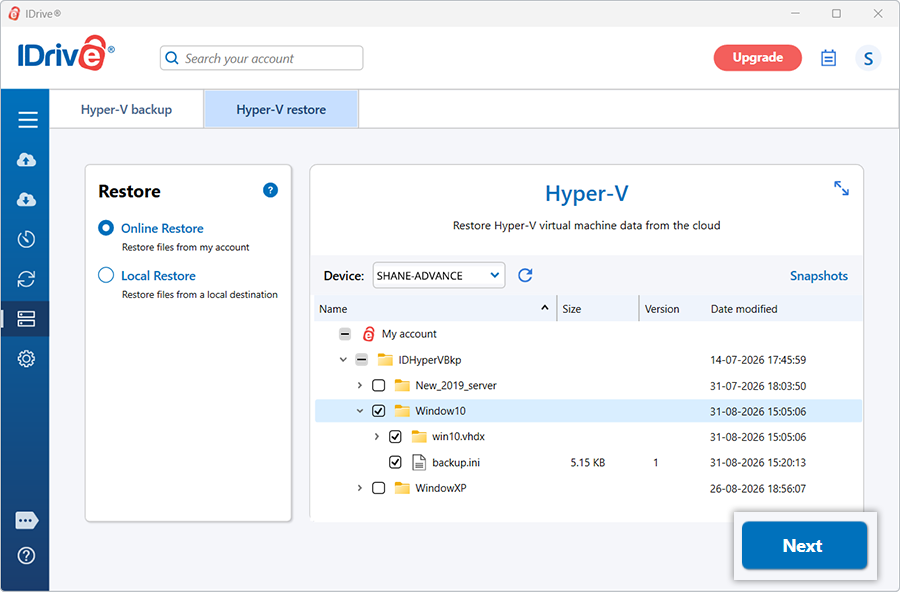
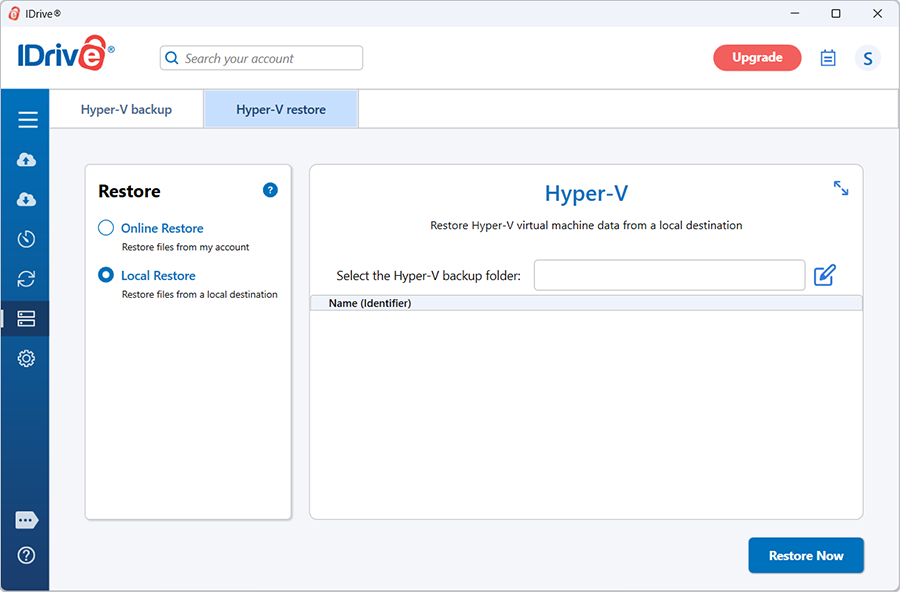
Click 'Hyper-V restore'.
Select 'Online Restore'.
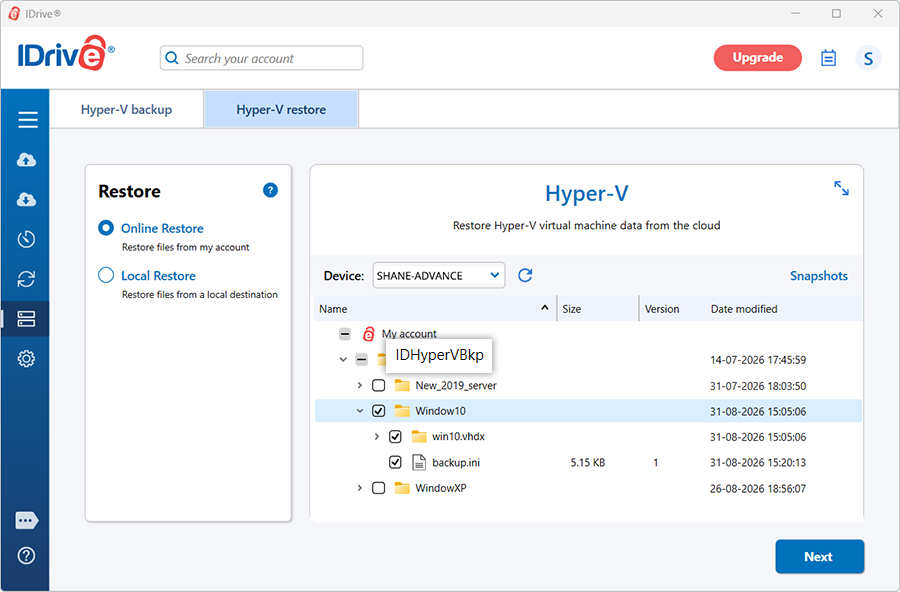
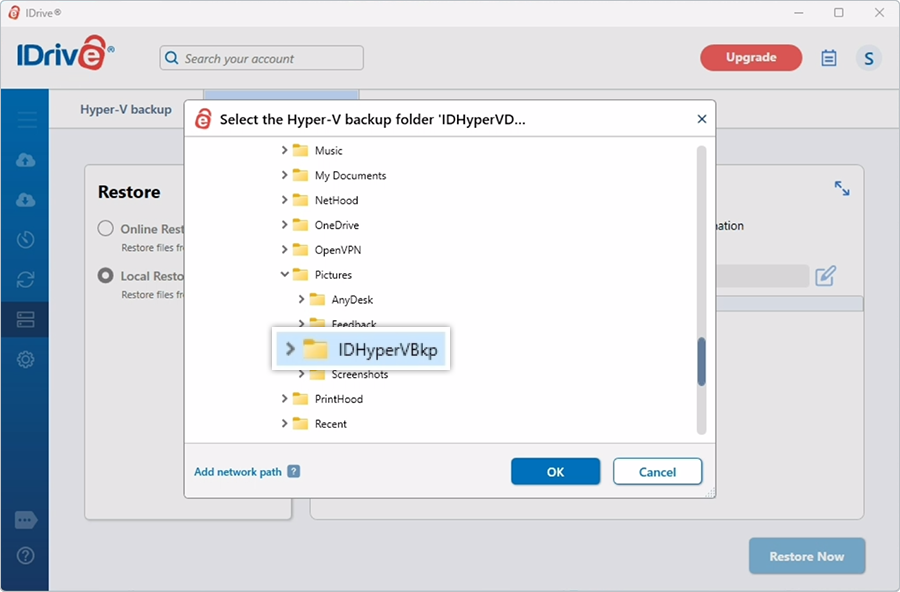
Locate and select the 'IDHyperVBkp' folder from your IDrive account.
Select the required virtual machines from the backup set and click 'Next'.
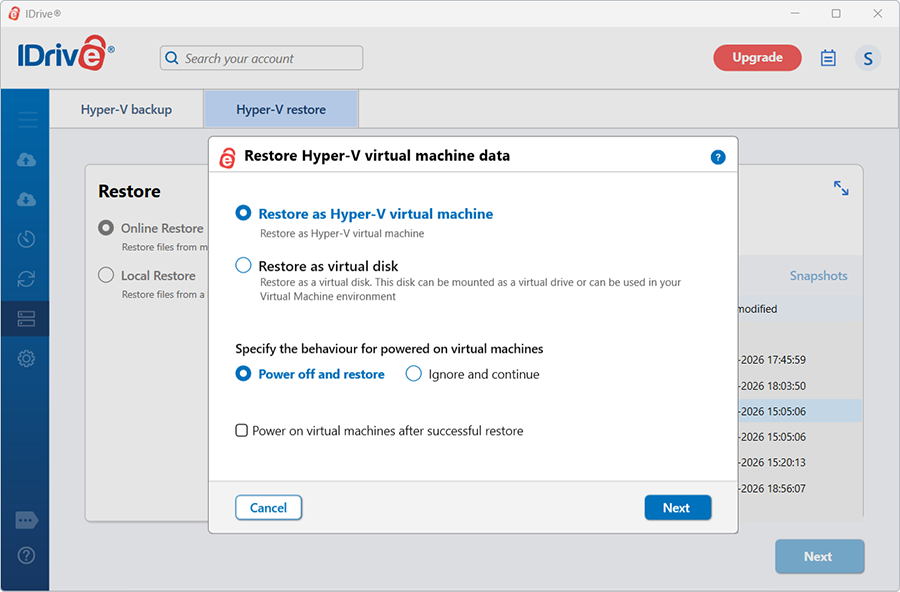
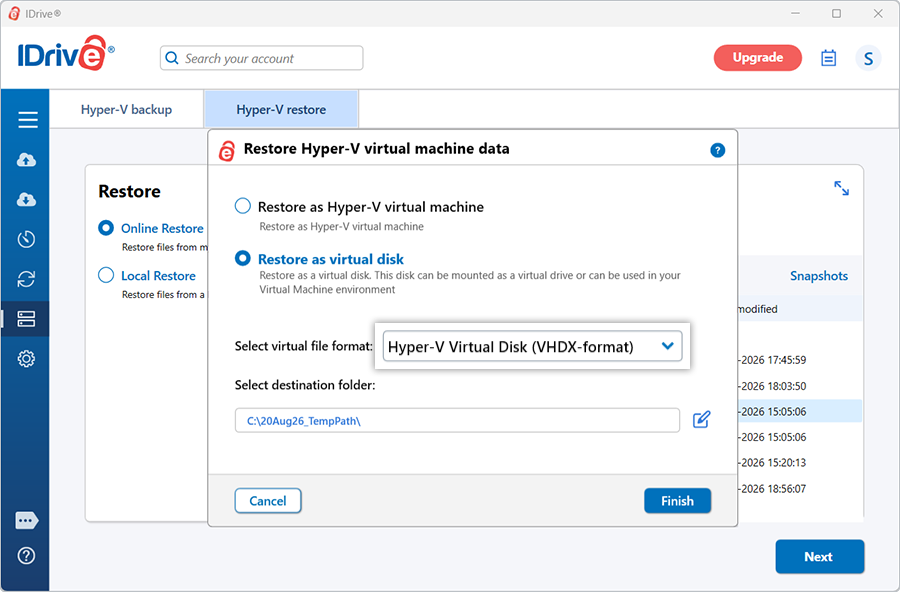
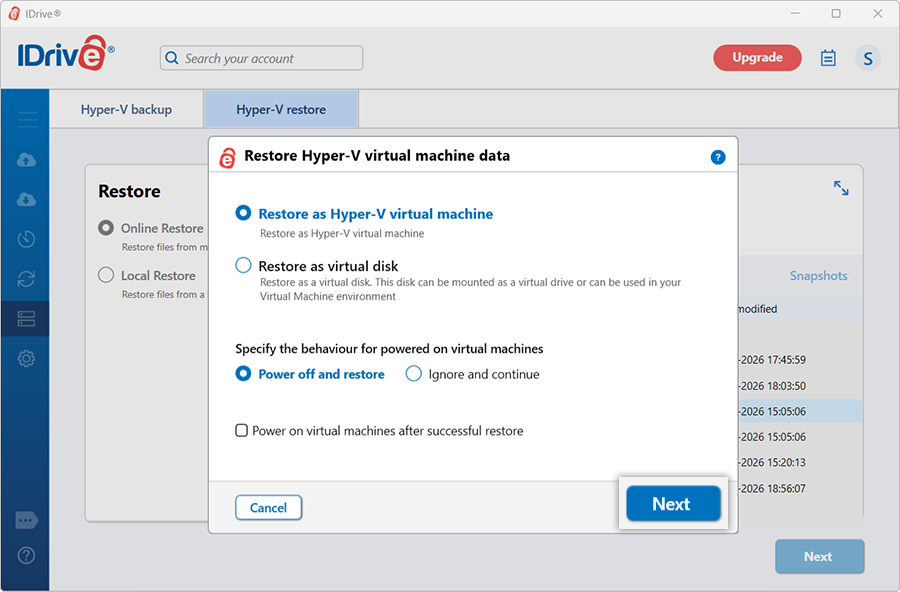
In the 'Restore Hyper-V virtual machine data' popup, choose one of the following restore options:
Restore as Hyper-V virtual machine
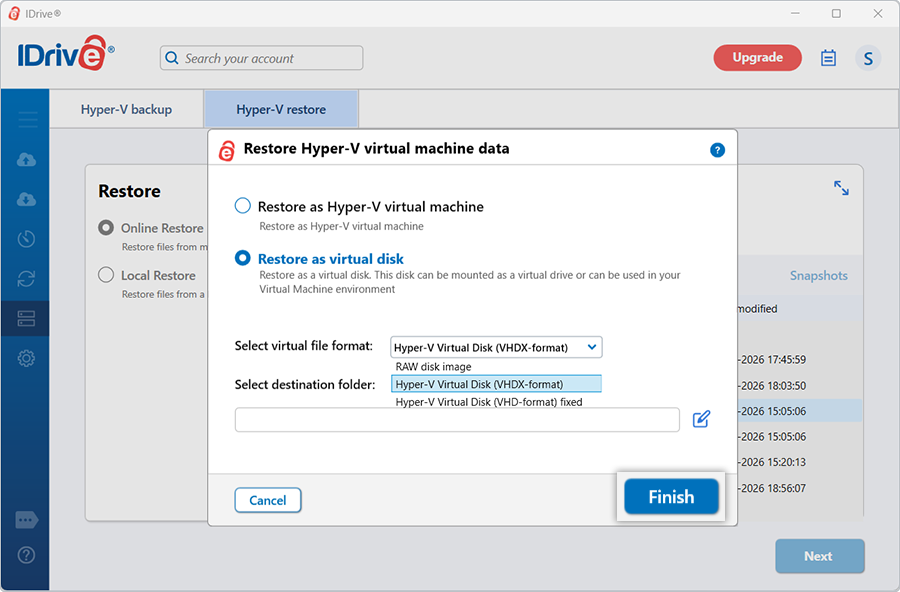
Restore as virtual disk
If 'Restore as virtual disk' is selected:
Select the required virtual disk format (Raw image, VHD, or VHDX).
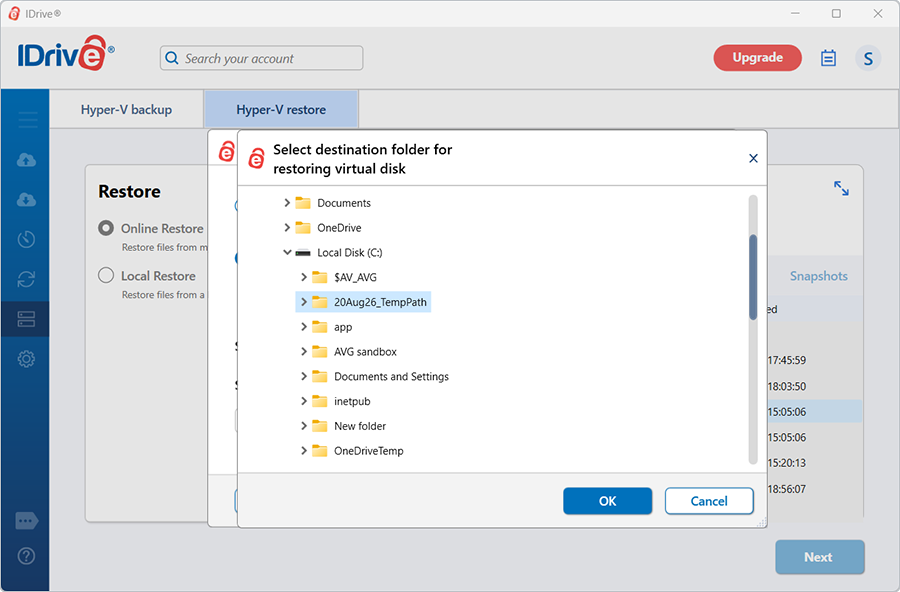
Select the destination folder where the virtual disk should be restored. Select the required virtual disk format (Raw image, VHD, or VHDX).
Click 'Finish' to start the restore. On successful completion, the restore summary is displayed.
If 'Restore as Hyper-V virtual machine' is selected:
Choose a power state option if required:
- Power off the VM before restore
- Ignore and continue (restore fails if the VM is powered on) - Power on the VM after successful restore
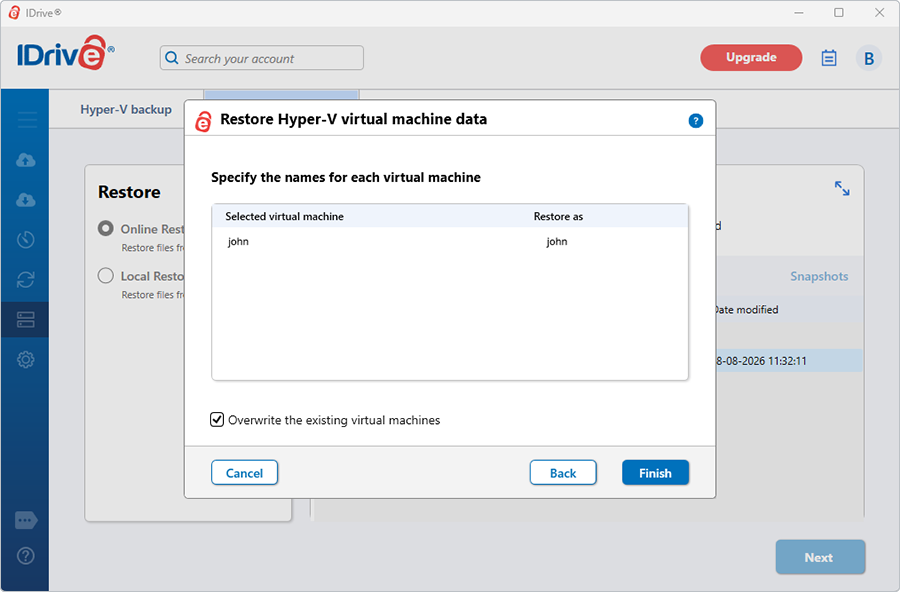
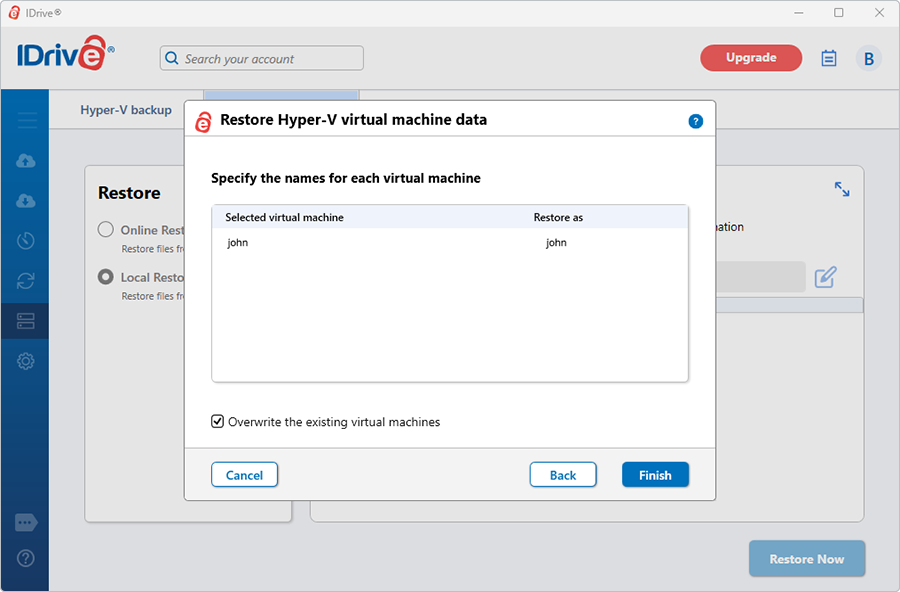
Click 'Next'. The 'Restore Hyper-V virtual machine data' popup appears.
By default, 'Existing machine' is selected.
To overwrite an existing VM, select 'Overwrite the existing virtual machines'.
To restore as a new VM, modify the VM name under 'Restore as' and enter a valid name.
Click 'Finish' to start the restore.
On successful completion, the restore summary is displayed.
Is there a need for an additional/external storage volume for Hyper-V virtual backup?
No. However, do ensure that the temporary location that you select while scheduling the Hyper-V backup has sufficient disk space to hold the selected items, during the backup process.
How do I merge the snapshots (avhd/avhdx) to Parent Disk?
To start the merge,
Identify the newest AVHD in the IDrive backup folder.
Rename the newest AVHD (AVHD4) to VHD.
Note: Do not rename all the AVHDs at the same time. Rename only the newest Avhd first.
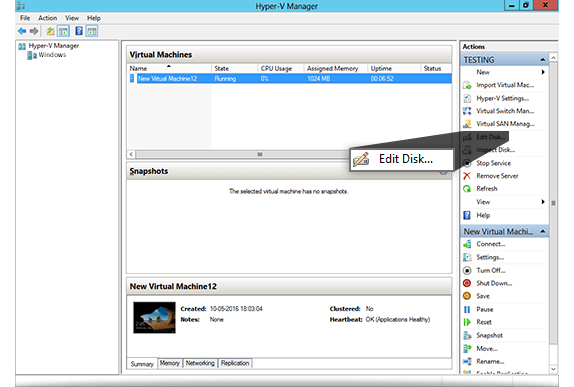
Choose 'Edit Disk' from 'Actions' in the Hyper-V Management Console.
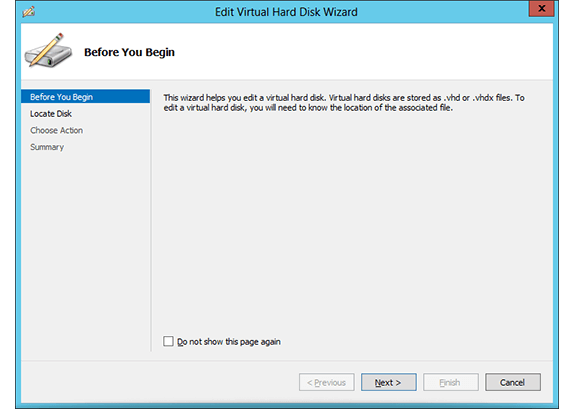
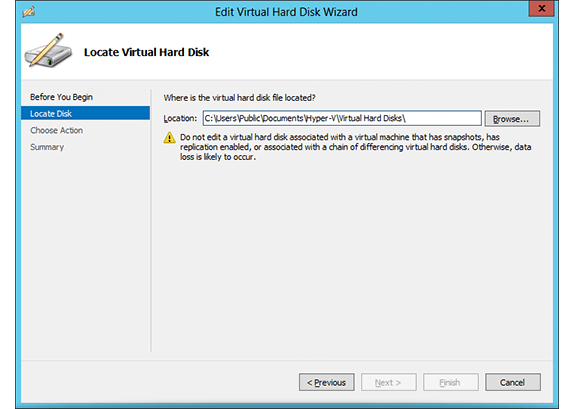
Click 'Next' through the first screen and select the snapshot file on the following screen.
Select 'Merge' on the next screen and choose 'To parent virtual disk'.
Click 'Finish'.
After merging, AVHD4 will be deleted automatically. Rename the second newest Avhd (AVHD3) to Vhd. Repeat all the steps until the oldest AVHD (AVHD1) gets merged with the parent VHD.
Which configuration version for virtual machines is supported on Windows server 2016 and above for incremental backup and restore of Hyper-V virtual machines?
Configuration version 8.0 for virtual machines is supported on Windows server 2016 and above for incremental online backup and restore of Hyper-V virtual machines.