Restore Hyper-V
Restore Hyper-V
Restore your virtual machines in case of any system failure or disaster.
To restore your Hyper-V virtual machines using Online Restore,
- Sign in to the IDrive application and click 'Server Backup'.
- Click ‘Hyper-V’. The Hyper-V backup/restore console appears.
- Click ‘Hyper-V restore’.
- Select 'Online Restore'.
- Browse and select the 'IDHyperVBkp' folder from your IDrive® account.
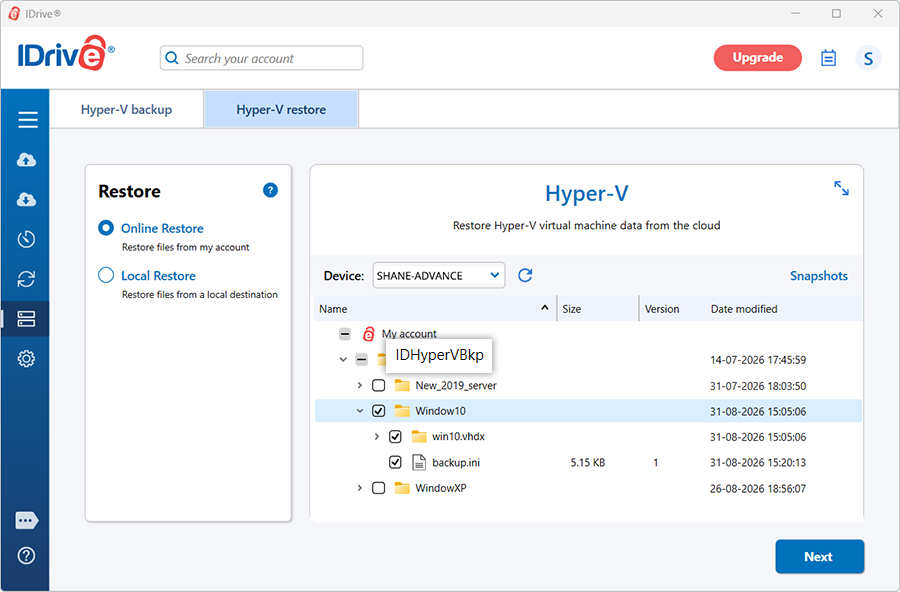
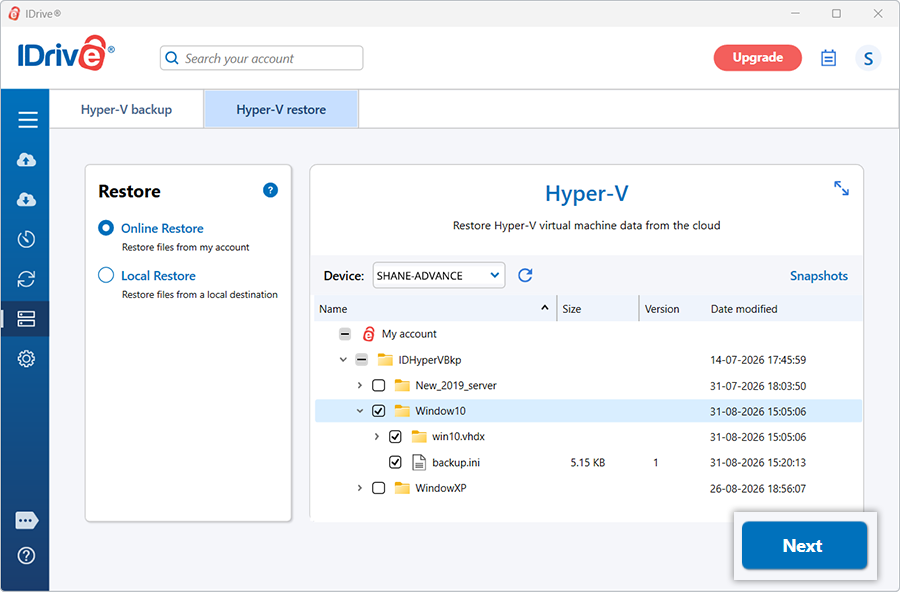
- Select the required virtual machines from the backup set and click 'Next'.
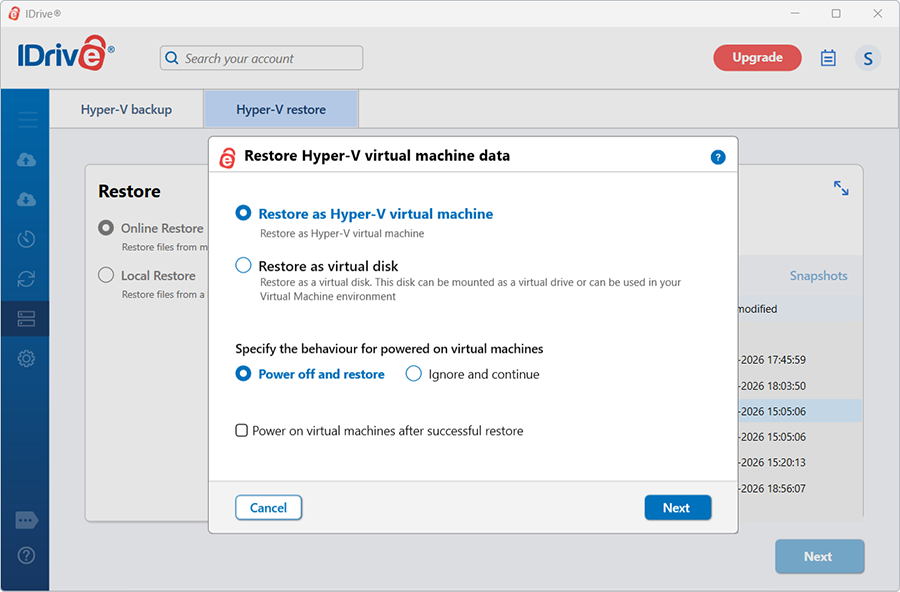
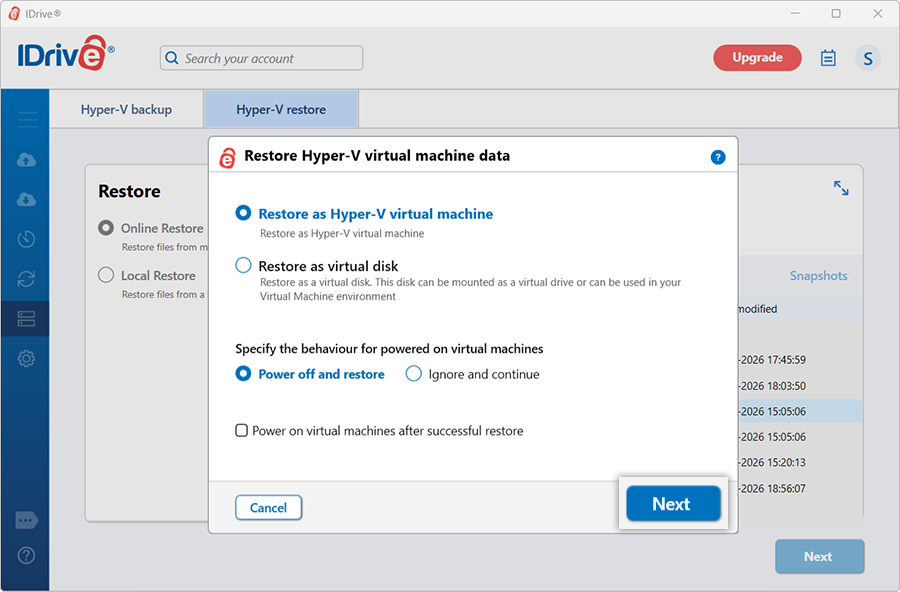
- In the 'Restore Hyper-V virtual machine data' popup, choose one of the following restore options:
- Restore as Hyper-V virtual machine
- Restore as virtual disk
If 'Restore as virtual disk' is selected:
- Select the required virtual disk format (Raw image, VHD, or VHDX).
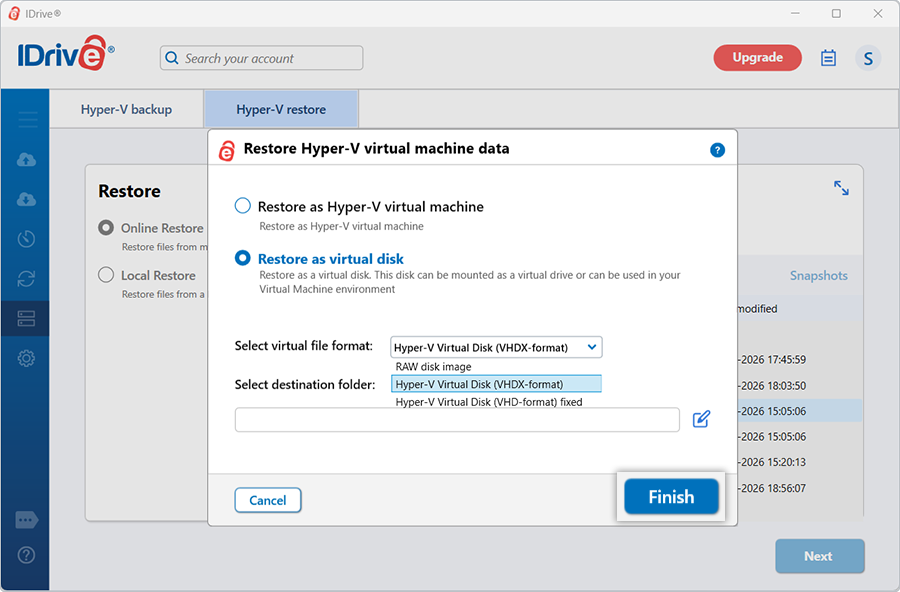
- Select the destination folder where the virtual disk should be restored.
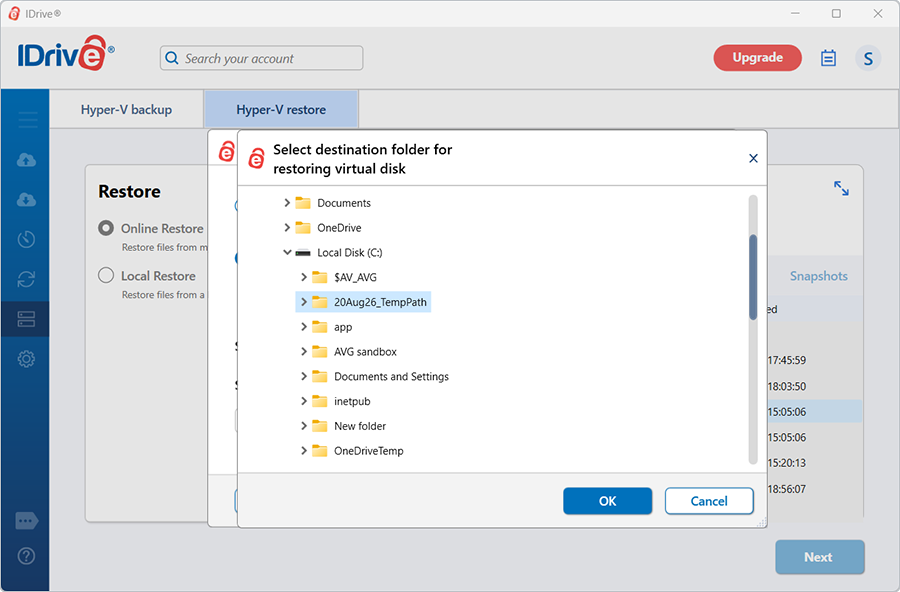
- Click 'Finish' to start the restore.
On successful completion, the restore summary is displayed.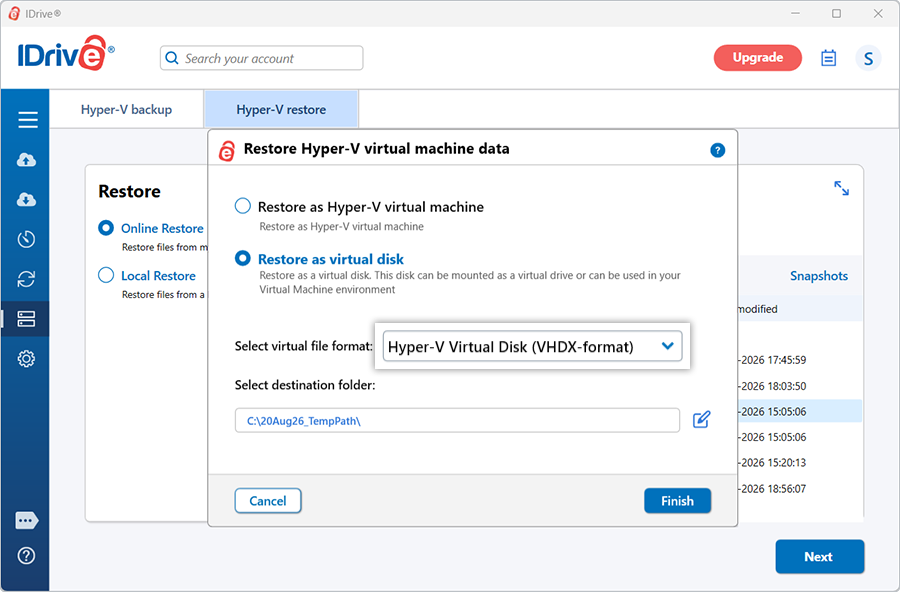
If 'Restore as Hyper-V virtual machine' is selected:
- Choose a power state option if required:
- Power off the VM before restore
- Ignore and continue (restore fails if the VM is powered on)
- Power on the VM after successful restore - Click 'Next'. The 'Restore Hyper-V virtual machine data' popup appears.
- By default, 'Existing machine' is selected.
- To overwrite an existing VM, select 'Overwrite the existing virtual machines'.
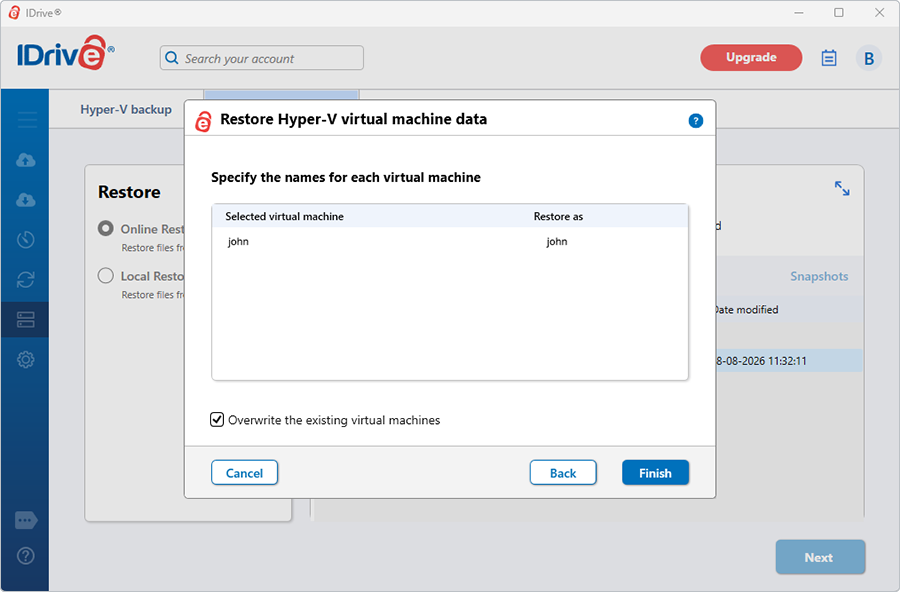
- To restore as a new VM, modify the VM name under 'Restore as' and enter a valid name.
- Click 'Finish' to start the restore.
Once the restore is successfully completed, the restore summary is displayed.
To restore your Hyper-V virtual machines using Local Restore,
- Sign in to the IDrive application and click 'Server Backup'.
- Click 'Hyper-V'. The Hyper-V backup/restore console appears.
- Click 'Hyper-V restore'.
- Select ‘Local Restore’.
- Browse and select the 'IDHyperVBkp'/'IDHyperVData' folder from your local drive.
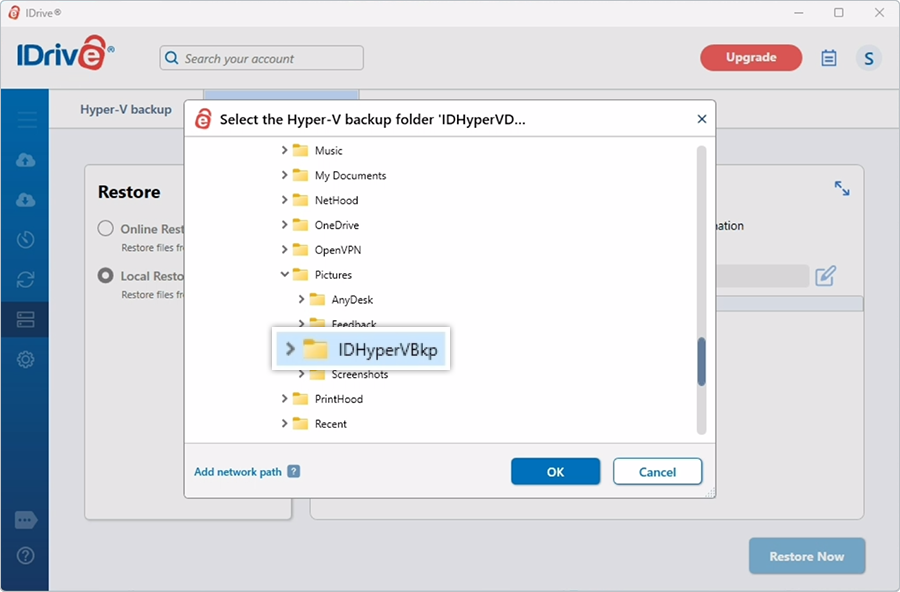
- Select the required virtual machines from the backup set and click 'Next'.
- In the 'Restore Hyper-V virtual machine data' popup, by default, 'Existing machine' is selected.
- To overwrite an existing VM, select 'Overwrite the existing virtual machines'.
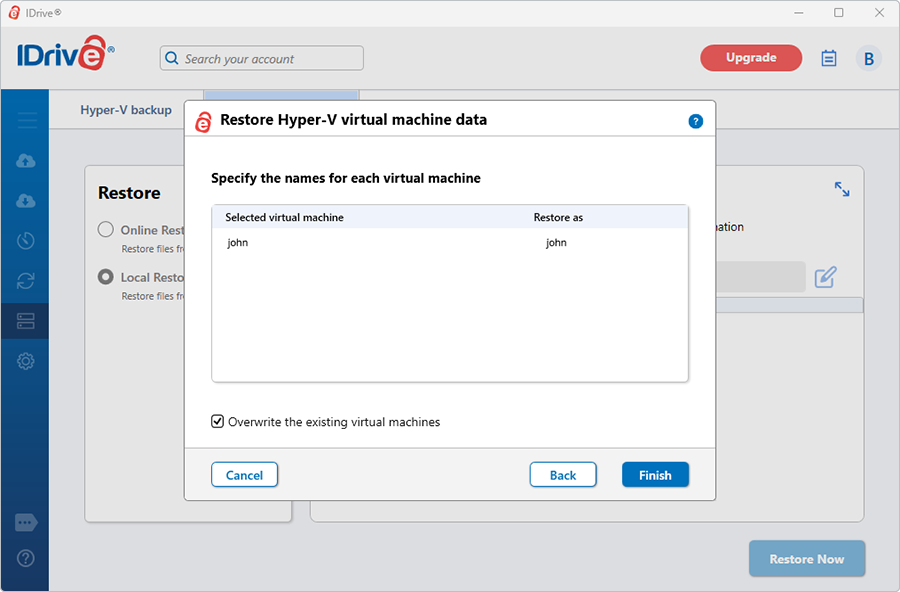
- To restore as a new VM, modify the VM name under 'Restore as' and enter a valid name.
- Click 'Finish' to start the restore.
Once the restore is successfully completed, the restore summary is displayed.
View the steps to backup Hyper-V.