Codex with IDrive® e2 Self-Hosted MCP
IDrive® e2 MCP connects your IDrive® e2 object storage with AI assistants and applications using the open Model Context Protocol (MCP) standard. It enables compatible AI clients to securely access and work with your data using natural language, eliminating the need for custom integrations, scripts, or manual workflows. This guide explains how to connect Codex with IDrive® e2 storage using self-hosted MCP on Windows, Linux, or Mac machines.
Prerequisites
- An active IDrive® e2 account.
- Access to a Codex account.
- Node.js 20 or newer
Reference Architecture
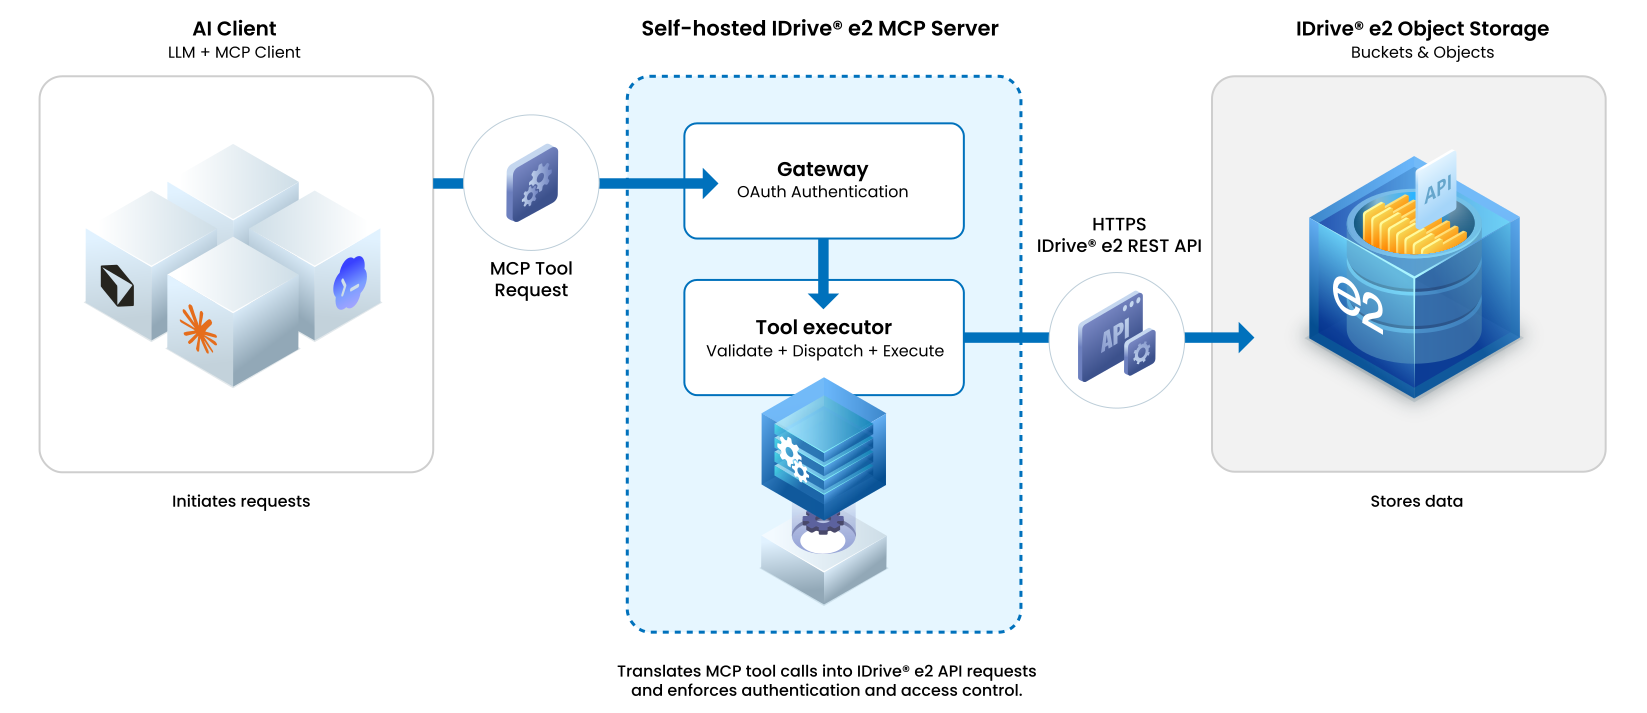
Deploy IDrive® e2 MCP Package
- Install the Self-hosted MCP package
Or install it in a Node.js project:npm install --global @idrivee2/s3-mcpnpm install @idrivee2/s3-mcp - Run the agent after installation:
The server starts in the background and prints its process ID, MCP URL, and log file. Use the default MCP URL to connect with Codex.idrivee2-s3-mcphttp://127.0.0.1:1908/s3
Configure Codex for IDrive® e2 MCP
- Login to Codex and go to Plugins.
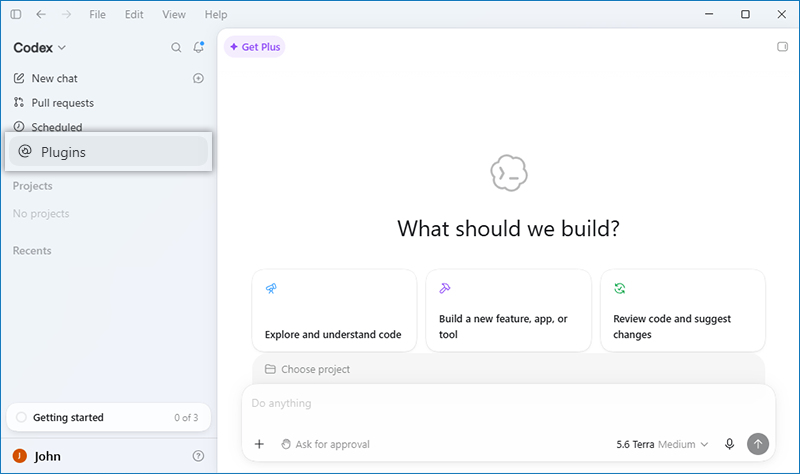
- Navigate to Installed and click
 .
.
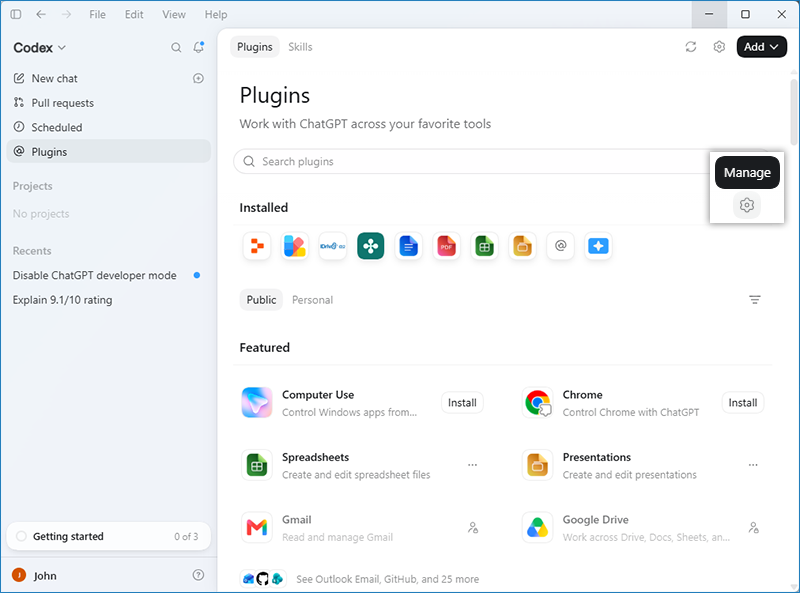
- Click Add and select Add MCP server from the dropdown.
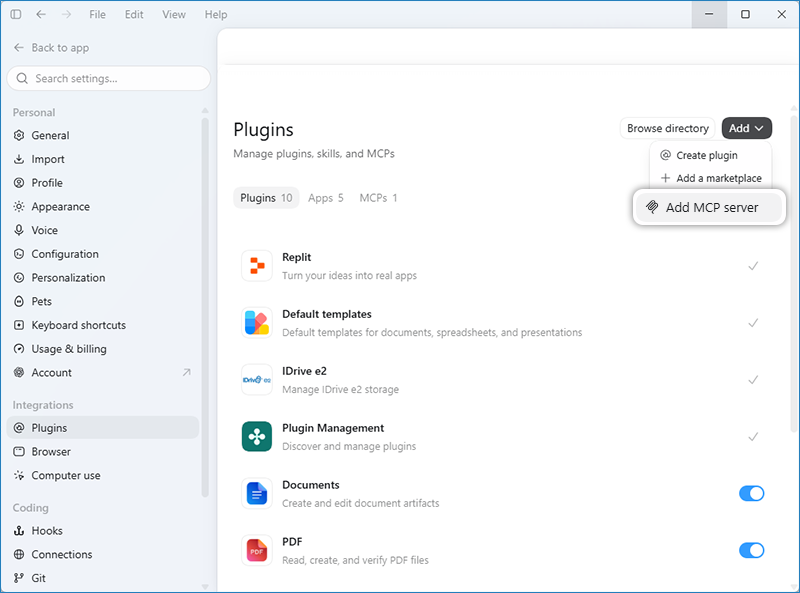
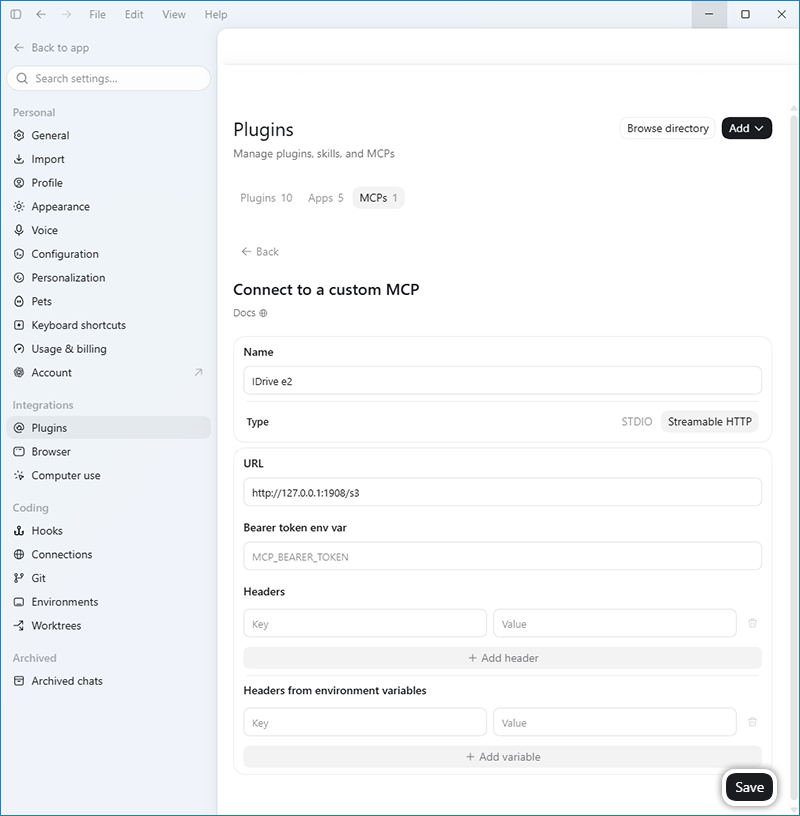
- Under Connect to a custom MCP dialog box, provide the following details and click Save.
- Choose Streamable HTTP
- Name for the connector: IDrive e2
- URL of the MCP server: http://127.0.0.1:1908/s3
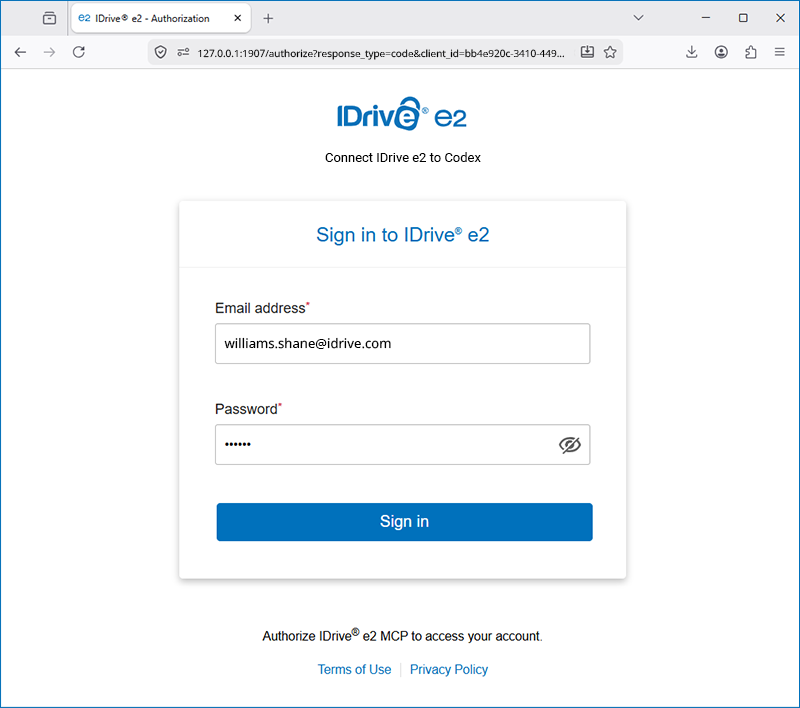
- You will be redirected to the IDrive® e2 web console.
- Enter your IDrive® e2 account email address and password and click Sign in.
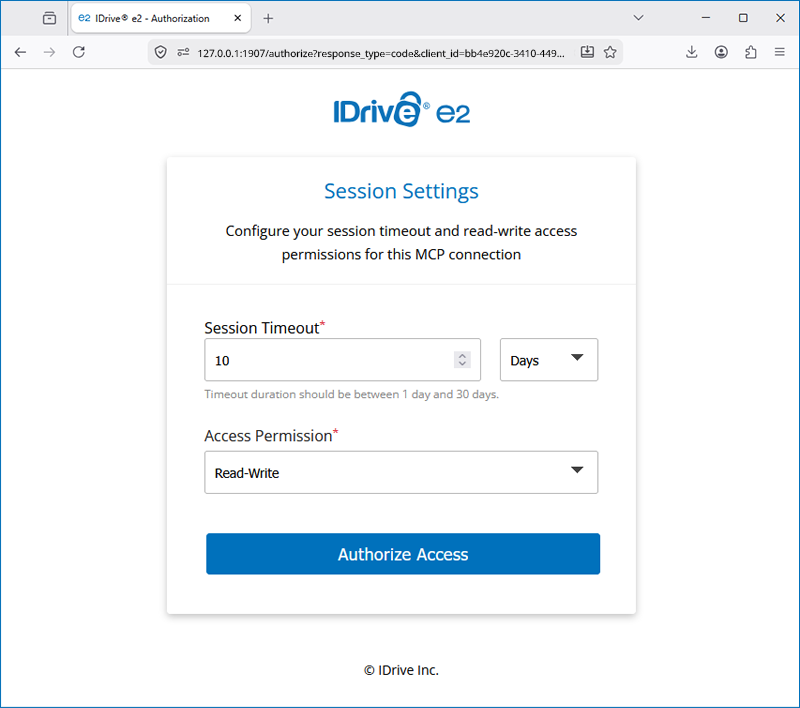
- Set session timeout duration and access permission.
- Once authenticated, you will be redirected to Codex. You can now use natural language prompts to interact with IDrive® e2 storage.
Connect the IDrive® e2 MCP Server to Codex CLI
You can connect the IDrive® e2 Model Context Protocol (MCP) server to Codex CLI using OAuth authentication.
- Add the IDrive® e2 MCP Server by executing the following command.
codex mcp add idrive-s3 \
--url http://127.0.0.1:1908/s3 - Authenticate with IDrive® e2
After executing the command, you will be redirected to the IDrive® e2 sign-in page.- Sign in using your IDrive® e2 credentials
- Set session timeout duration and access permission.
- Click Authorize to grant Codex access to your IDrive® e2 account.
- After authorization, you are redirected back to Codex. You can now start using the IDrive® e2 MCP tools from within Codex CLI.