Related Links
Integrate Next3 Offload with IDrive® e2
Next3 Offload lets you offload your WordPress media to a cloud destination and speeds up your websites. Use IDrive® e2 as a cloud storage destination in Next3 Offload and store your offloaded WordPress Media.
Prerequisites
Before uploading Next3 Offload files, you require:
- An active IDrive® e2 account. Sign up here if you do not have one.
- A bucket in IDrive® e2. See how to create a bucket.
- Valid Access Key ID and Secret Access Key. Learn how to create an access key.
Integrate IDrive® e2 with Next3 Offload
- Download and activate the Next3 Offload plugin in WordPress
- Log in to the WordPress admin dashboard with valid credentials.
- In the WordPress dashboard, go to Next3 Offload > Setup.
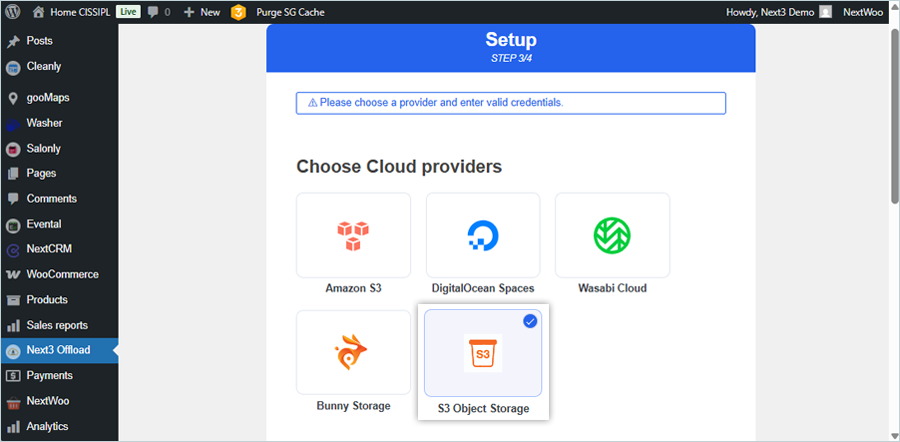
- Choose 'S3 Object Storage' as the cloud provider.
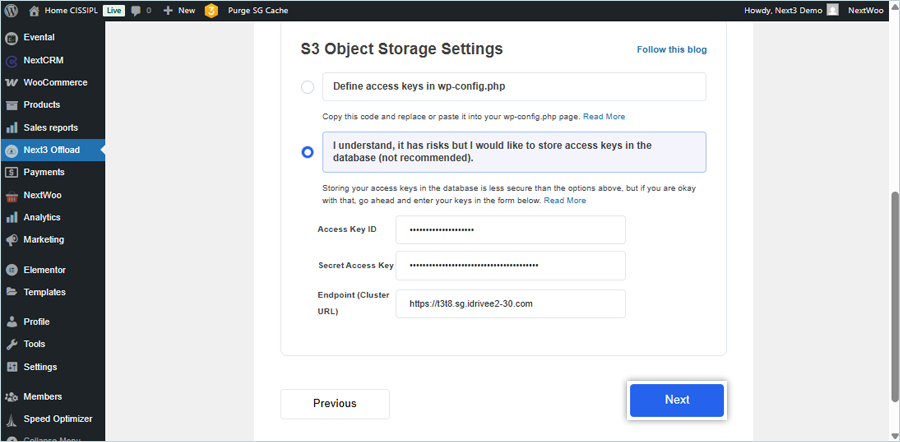
- Enter your IDrive® e2 credentials:
- Enter your IDrive® e2 Access Key as Access Key ID
- Enter your IDrive® e2 Secret Key as Access key secret
- Enter your IDrive S3 endpoint as Endpoint URL (https)
- Click Next.
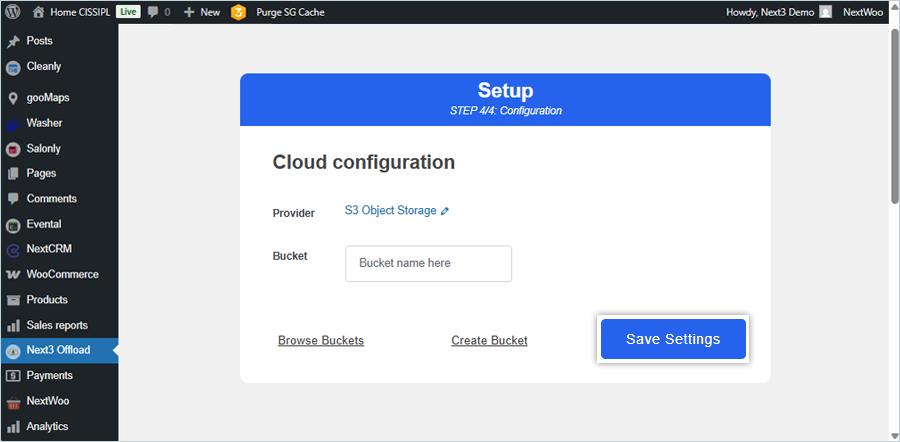
- Click 'Browse Buckets' to select a bucket in IDrive® e2 or click 'Create Bucket'. Your WordPress media files will be offloaded in this bucket.
- Click 'Save Settings'.
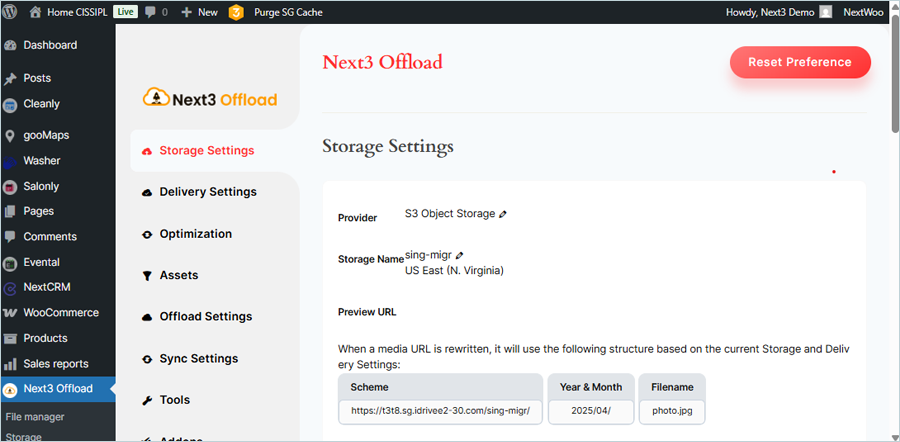
- Click 'File Manager' in LHS under Next3 Offload plugin, to access IDrive® e2 bucket.
Configure Storage Settings
Once IDrive® e2 is integrated with Next3 Offload, you must configure basic storage settings.
- In the WordPress dashboard, go to Next3 Offload > Storage Settings.
- Under 'General Options', you can configure 'Offload media' and 'Copy to local server' settings.
- Under 'Setup Path', you can add prefix to bucket path, add year & month to bucket path, add object version to bucket path, and rename files.

- Click 'Save Settings'.
Set Up The Offload Settings
- In the WordPress dashboard, go to Next3 Offload > Offload Settings.
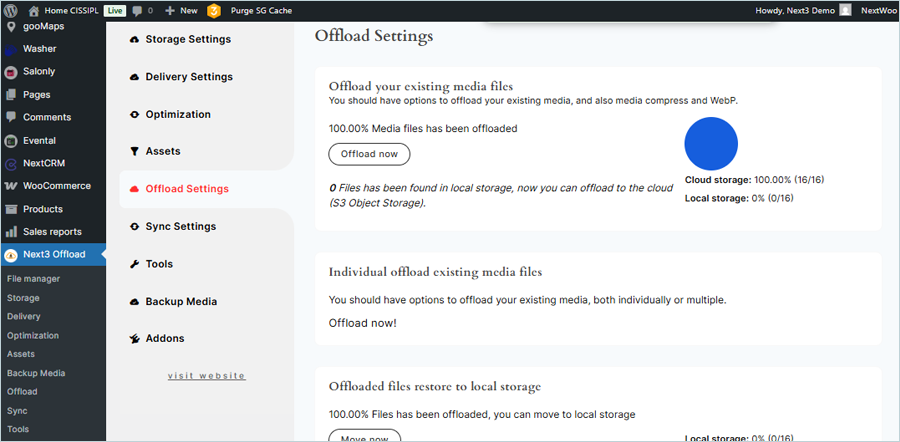
- You can offload all your media files in bulk or offload individual files as needed.
- Additionally, you can:
- Restore offloaded files to local storage
- Clean up offloaded files from local storage
- Offload existing CSS and JS files to IDrive® e2 cloud storage