Cohesity / Veritas NetBackup With IDrive® e2
NetBackup Client Backup is an enterprise solution that protects servers and endpoints by transmitting files, directories, or partitions to a central NetBackup server under automated backup policies. It supports full, incremental, and scheduled backups with flexible recovery options across disk, tape, or cloud storage. Integrating NetBackup Client Backup with IDrive® e2 adds a capable and scalable cloud object storage solution that facilitates systematic integration for secure and efficient business data protection.
Prerequisites
Before you begin, ensure the following:
- An active IDrive® e2 account. Sign up here if you do not have one.
- A bucket in IDrive® e2. See how to create a bucket.
- Valid Access Key ID and Secret Access Key. Learn how to create an access key.
- Veritas NetBackup v 11.0 and later.
Adding Support for IDrive e2
To use IDrive e2 with NetBackup v11.0 and above, two configuration packages must be downloaded and installed on the NetBackup Server. This will display IDrive e2 as a dropdown option.
- A device mappings package file v1.185
For the Linux/UNIX version of NetBackup, the file and instructions can be found here.
For the Windows version of NetBackup, the file and instructions can be found here. - Cloud configuration package v 2.13.6, the file and instructions can be found here.
For more information, please refer to the NetBackup HCL document.
The following steps can help you successfully integrate NetBackup Client Backup with IDrive® e2.
Add IDrive® e2 storage as MSDP Cloud with Media Server
- Install NetBackup Primary Server and log in to the Primary Server web console.
- Click Storage in the left-side menu from the Dashboard.
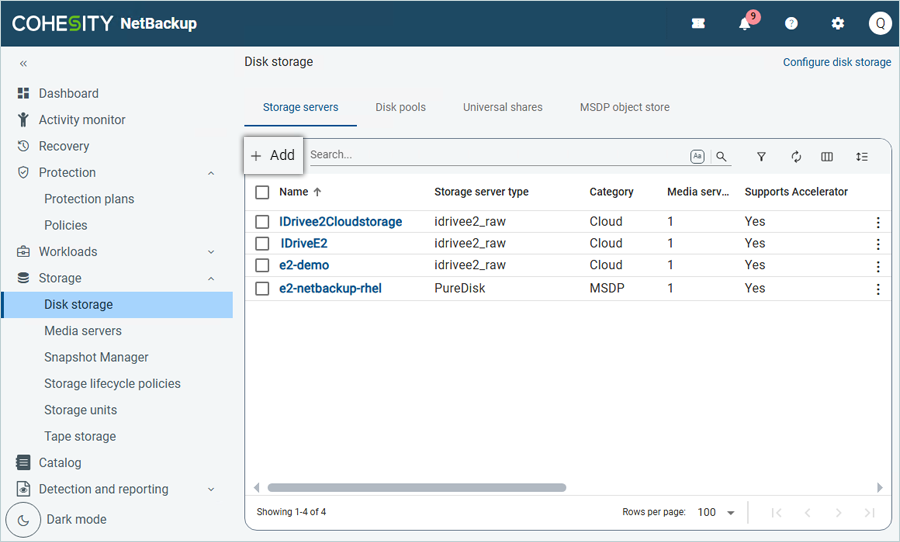
- Select Disk Storage and click Add.
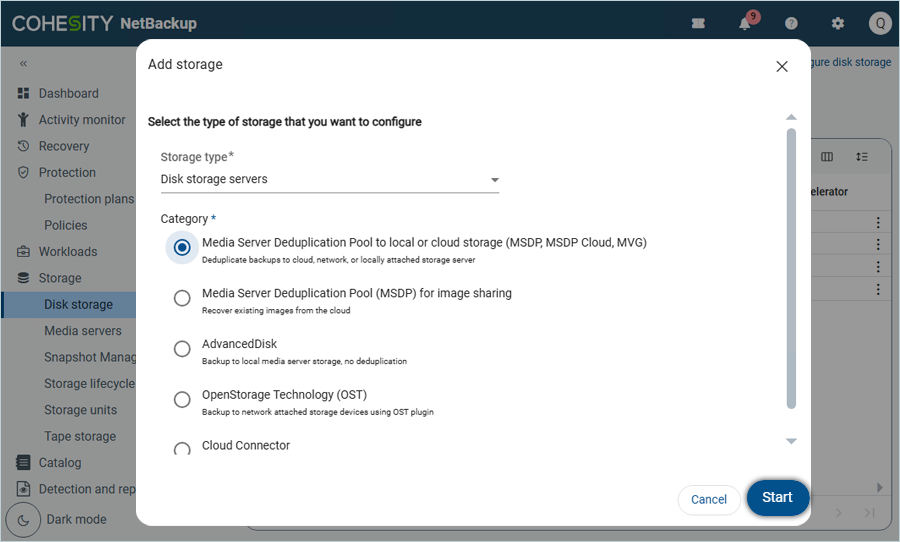
- In the Add Storage window, select Disk storage servers as the Storage Type. Select Media Server Deduplication (MSDP Cloud) as the Category and click Start.
- In the Add MSDP storage server window, under Basic Properties
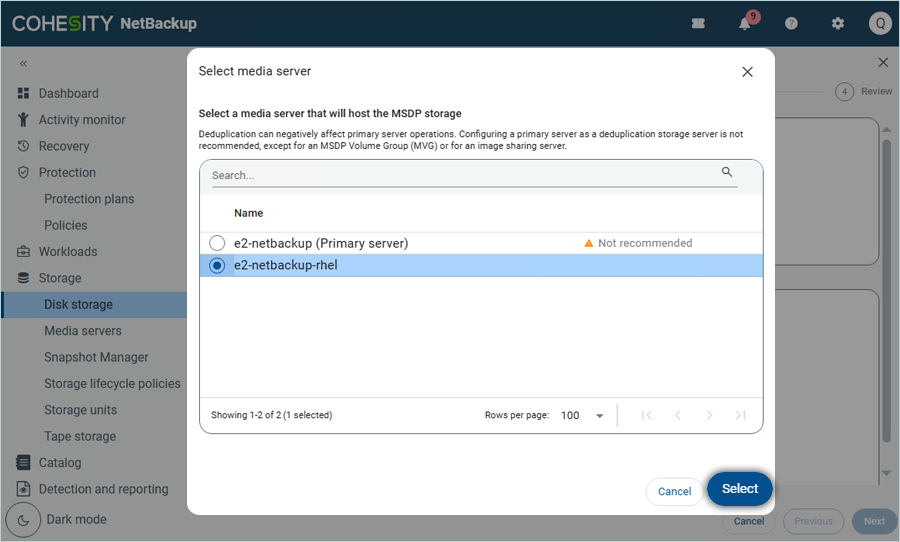
- Click Media Server to select the media server.
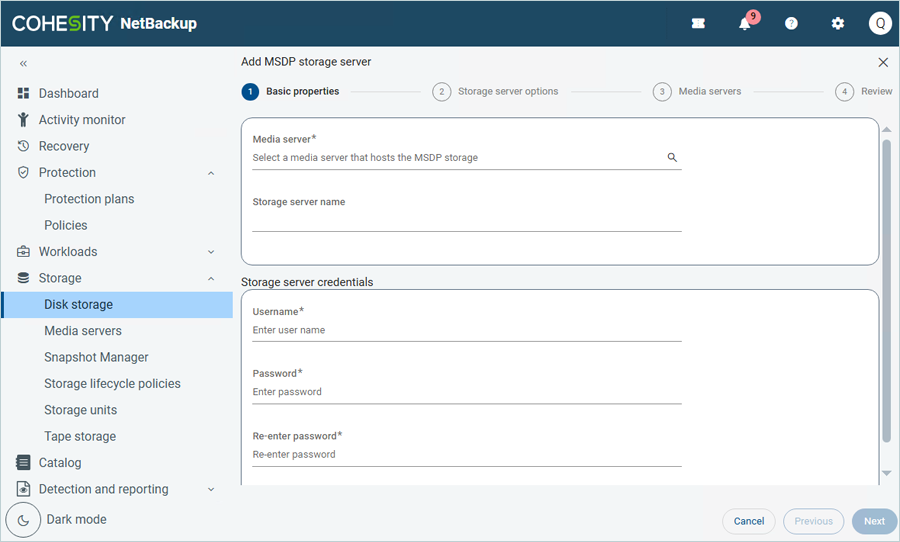
- Select Media Server from the list and click Select.
- Enter the Storage server credentials (These should be Media Server Credentials).
- Click Next.

- Click Media Server to select the media server.
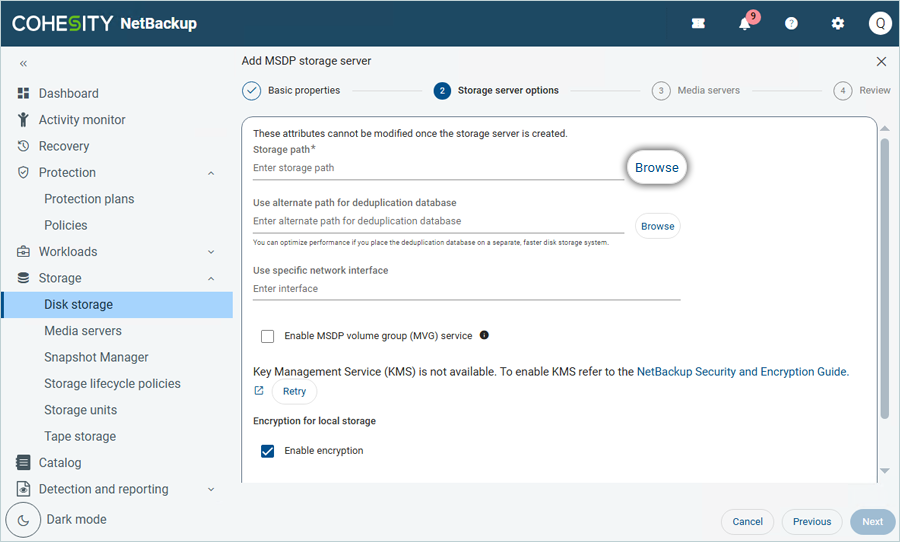
- Under Storage Server options,
- Click Browse to select the storage path.
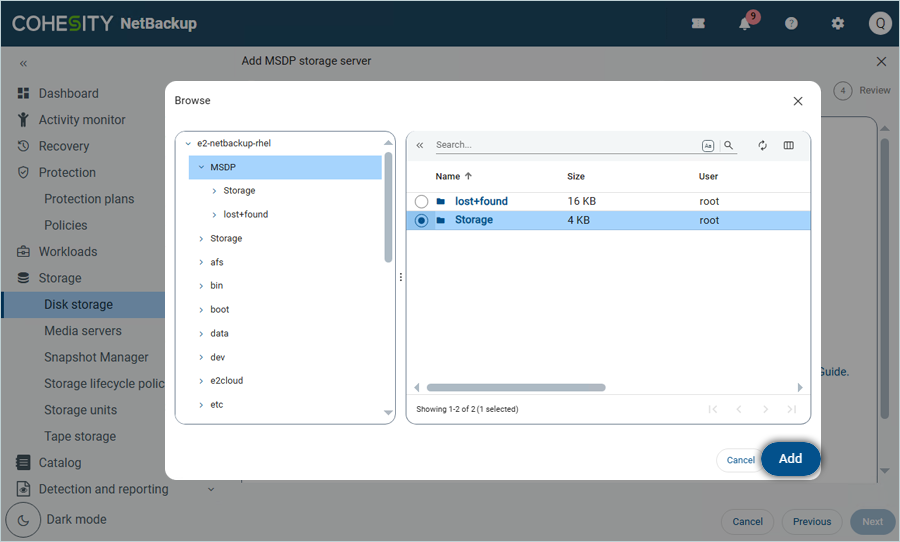
- Select Storage (Folder from Media Server) and click Add.
- Click Next.
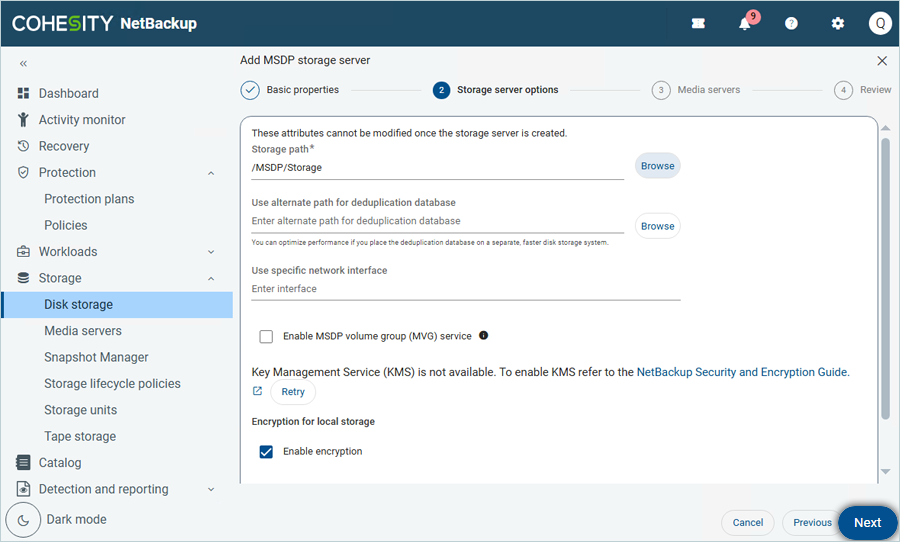
- Click Browse to select the storage path.
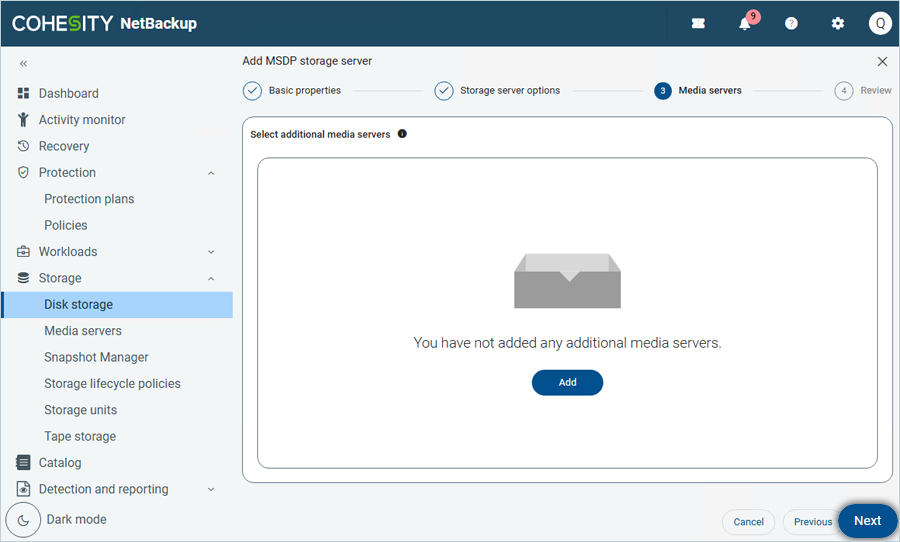
- Add additional Media Server if required (Optional), and click Next.
- Review the Summary and click Save.
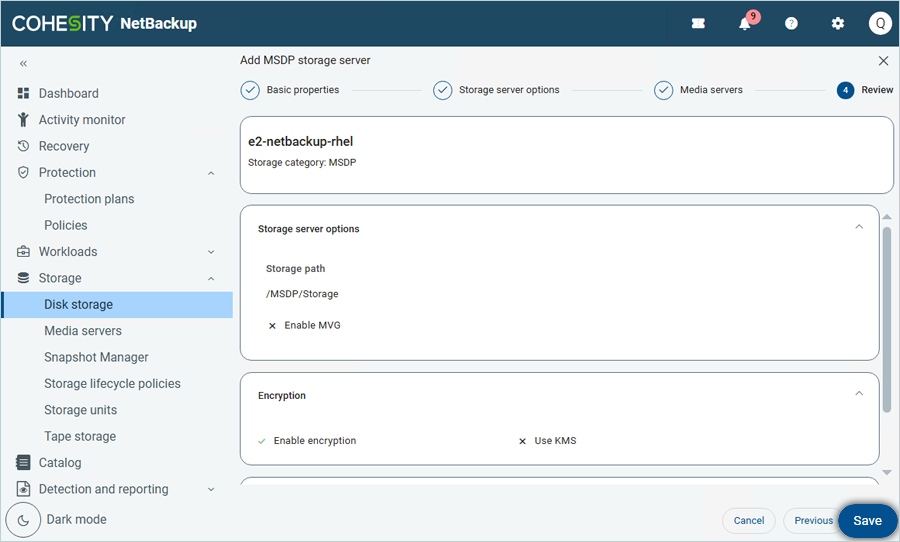
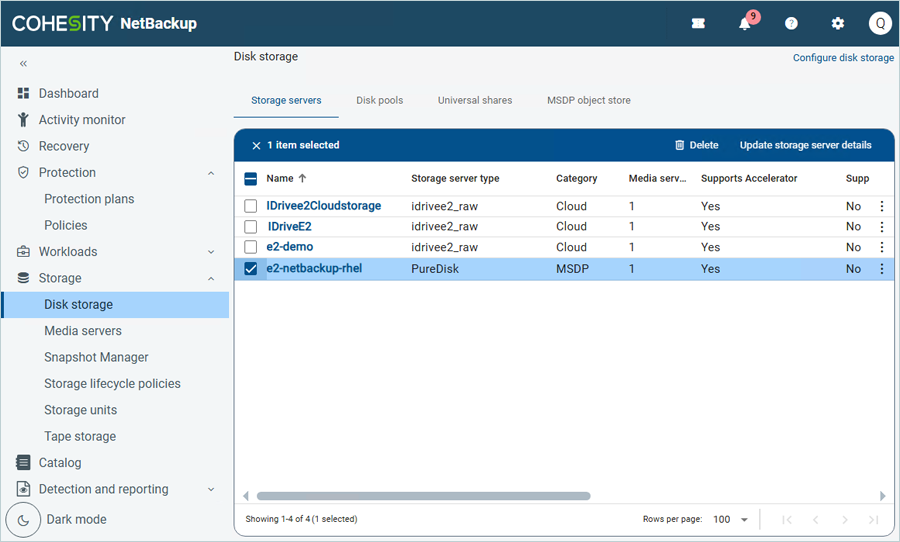
The MSDP Cloud Storage is now successfully added and listed.
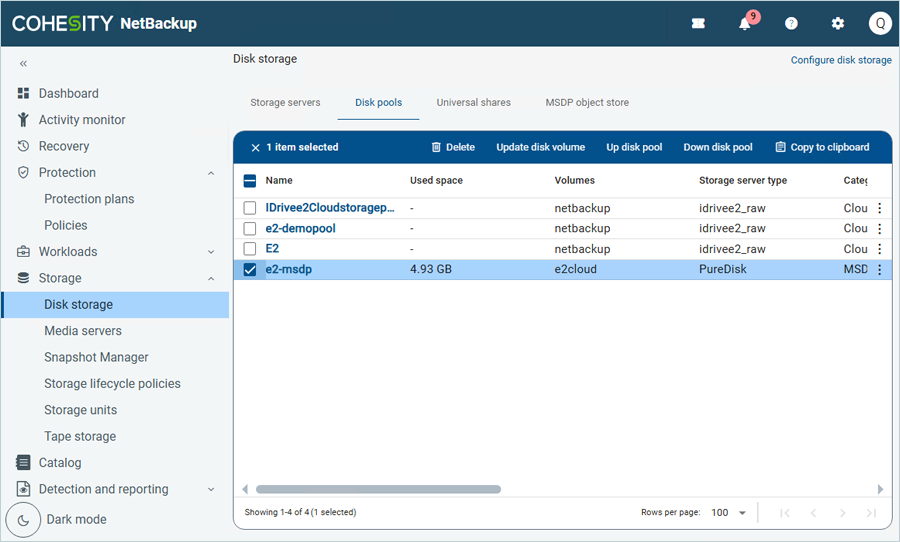
Add Disk Pool
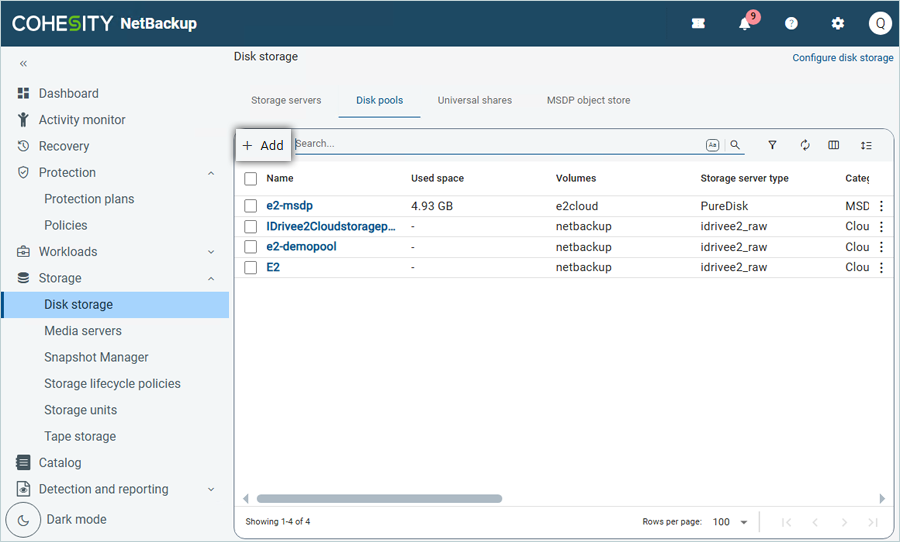
- Click Disk Storage under Storage in the left-side menu bar.
- Click the Disk Pool tab on the header.
- Click Add to create a new disk pool.
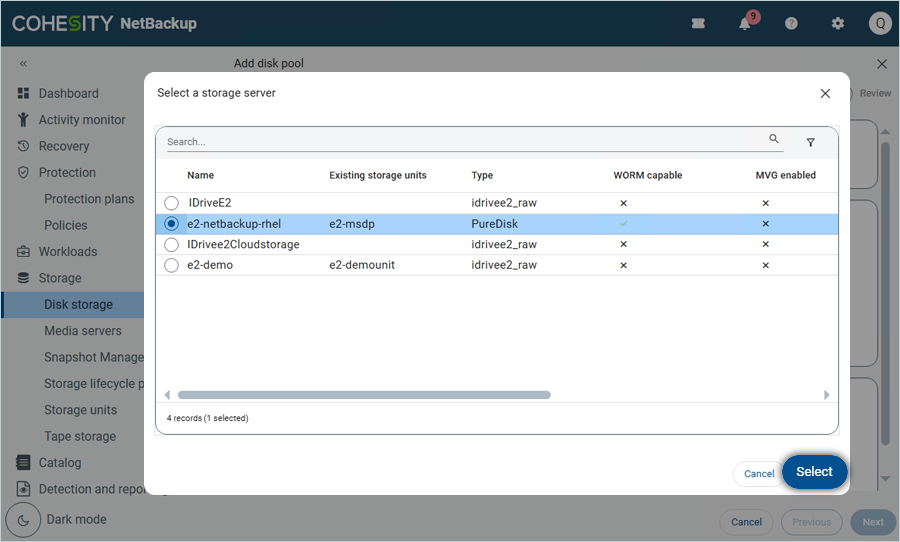
- In the Add disk pool window, click Change to select a storage server.

- Select your e2 MSDP storage server from the list and click Select (Created in the previous step).
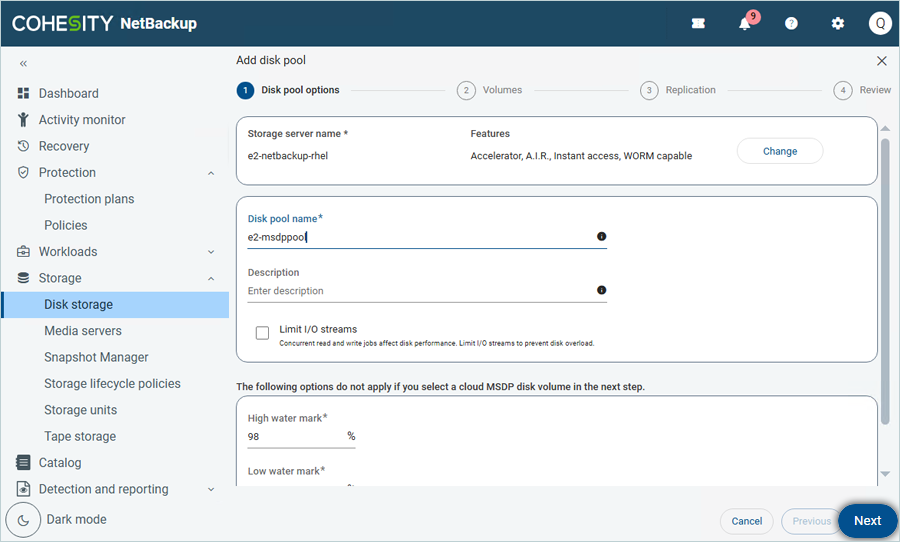
- Enter the Disk pool name and description. Then click Next.
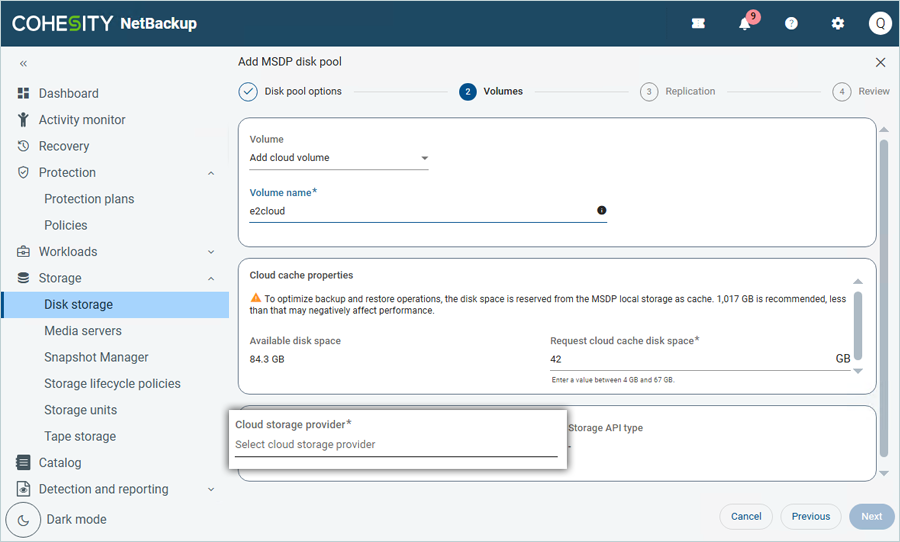
- In Volumes, click Select volume and then select Add cloud volume.

- Enter a Volume name.
- Click Select cloud storage provider to choose the cloud storage provider.
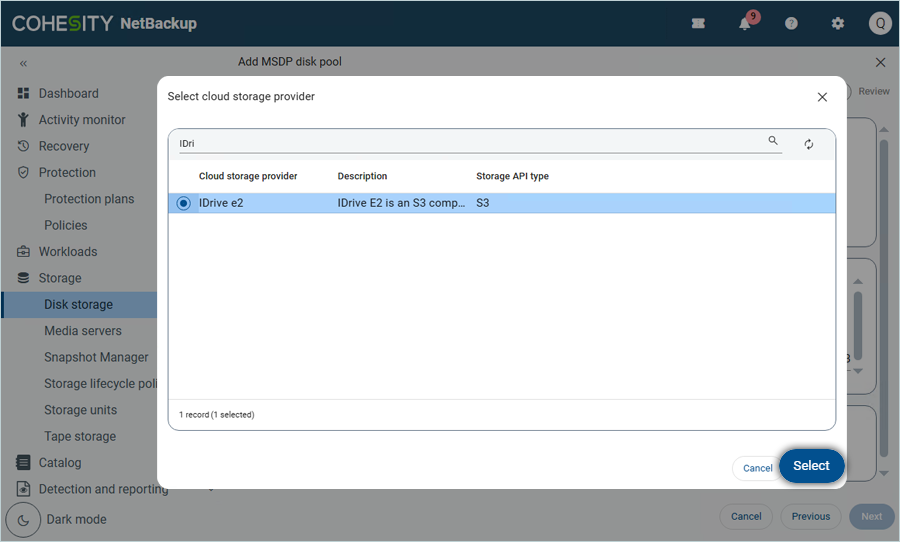
- Select IDrive® e2 as the provider and click Select.
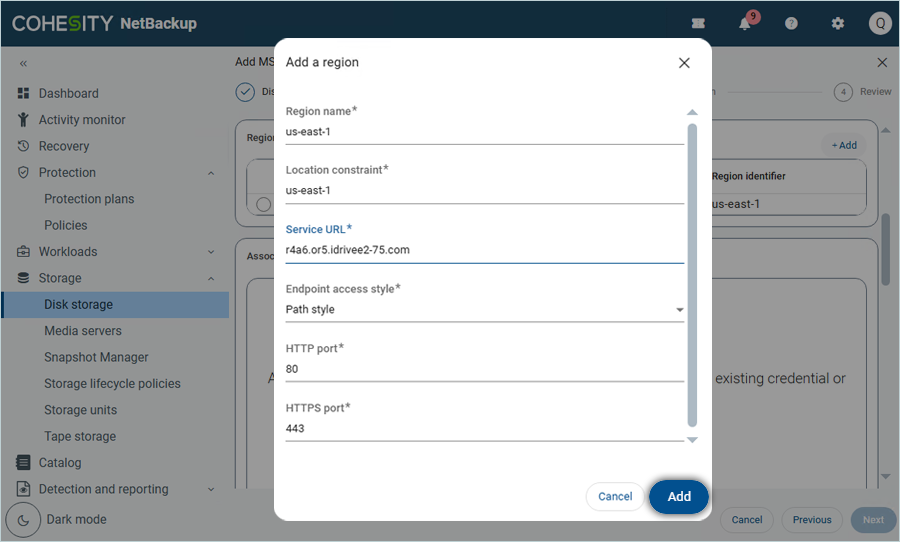
- Scroll down in Volumes, click on + Add to add the Region.
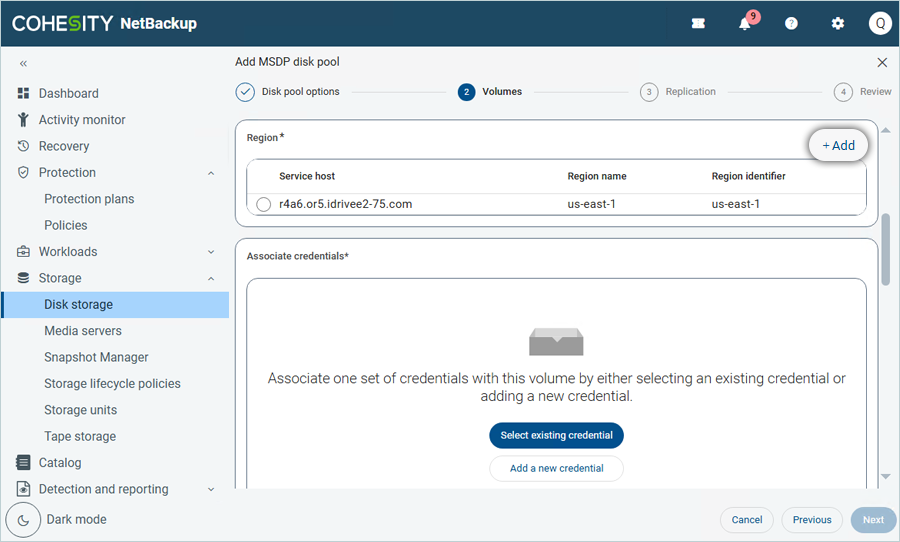
- In the Add a region window, enter the following details,
- Enter Region name (For all e2 Regions, enter the name as us-east-1).
- Enter Location constraint (For all e2, Location constraint should be us-east-1).
- Enter your IDrive® e2 endpoint as Service URL.
- Select Path Style as Endpoint access style.
- Keep the default value for both HTTP and HTTPS ports (80 & 443).
- Click Add.
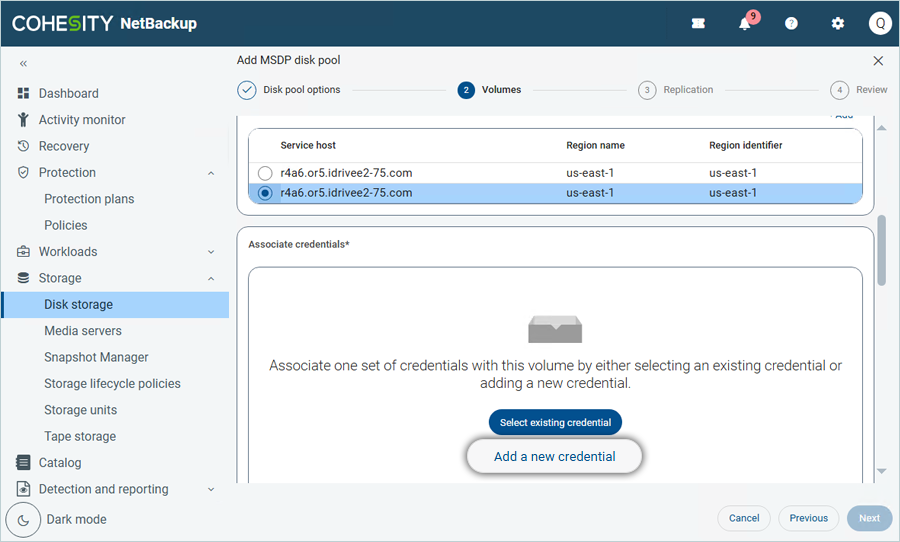
Now, select the Added region from the list and scroll down
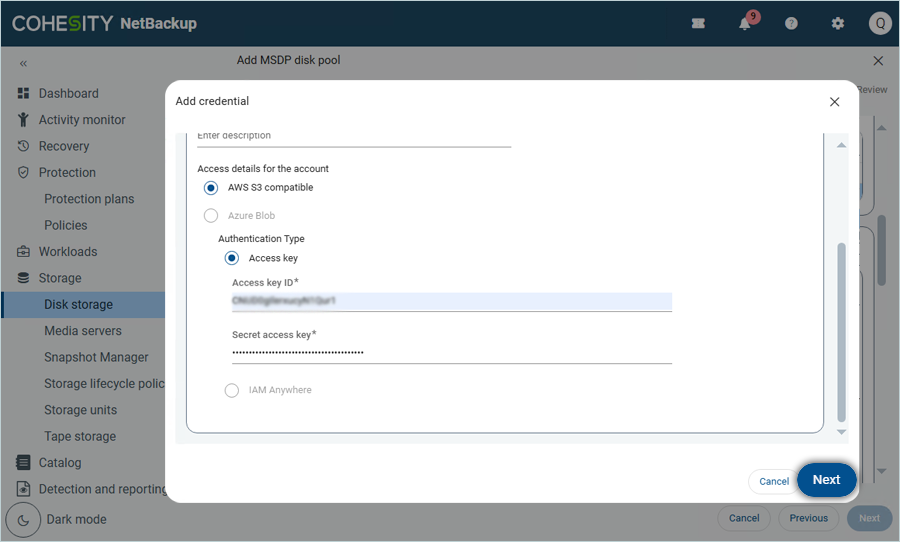
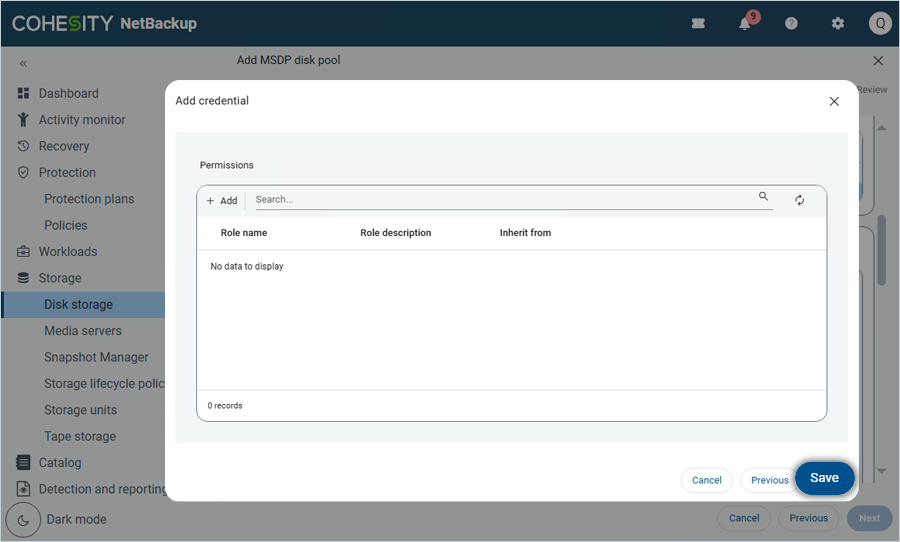
- Click Add a new credential under Associate credentials and enter your IDrive® e2 details as mentioned.
- Enter the Name for the Credential.
- Enter your IDrive® e2 Access Key as Access Key.
- Enter your IDrive® e2 Secret Key as Secret Key.
- Click Next and then click Save under Permissions.
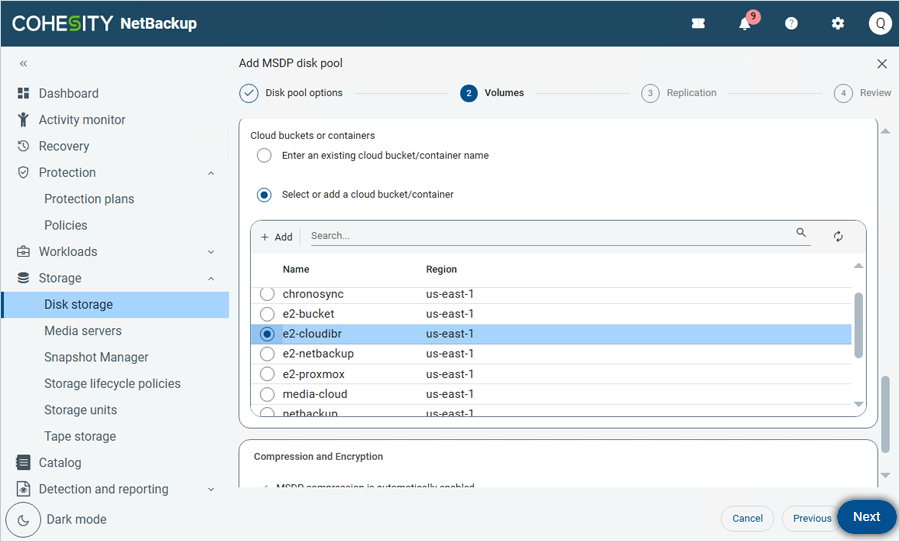
- Scroll down and choose Select or add a cloud bucket/container to add your e2 bucket.
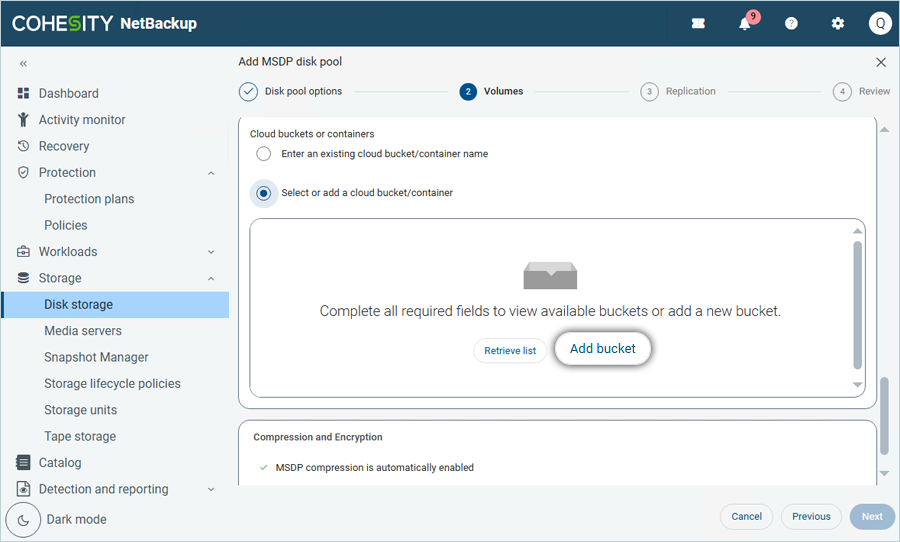
- Click Retrieve list and select the Bucket from the list. Click Next.
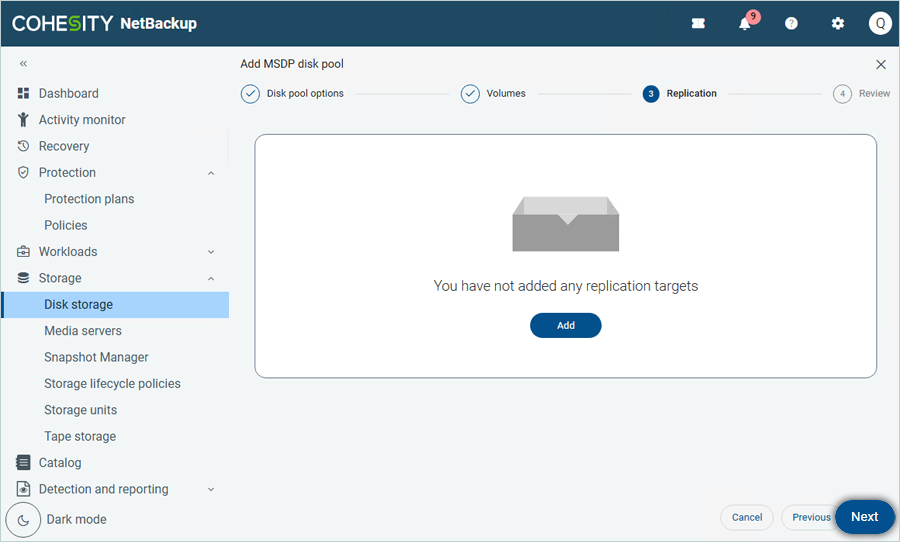
- Add Replication if required and click Next.
- Review the summary and click Next.
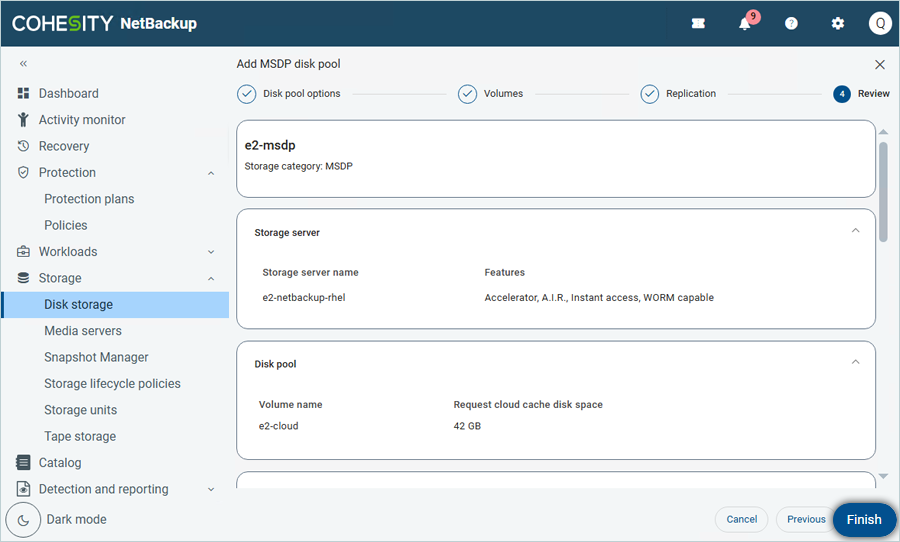
The Disk Pool has been successfully added and listed.
Add Policy and Run Backup
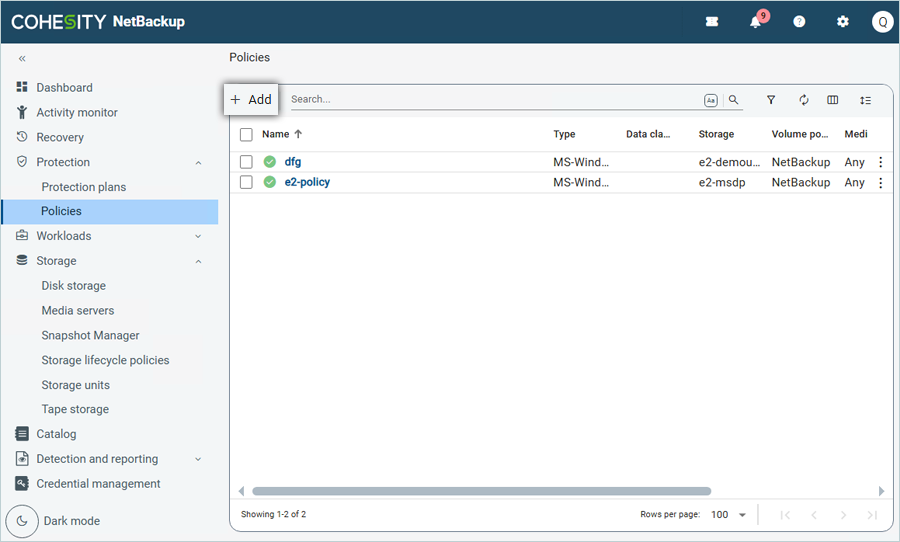
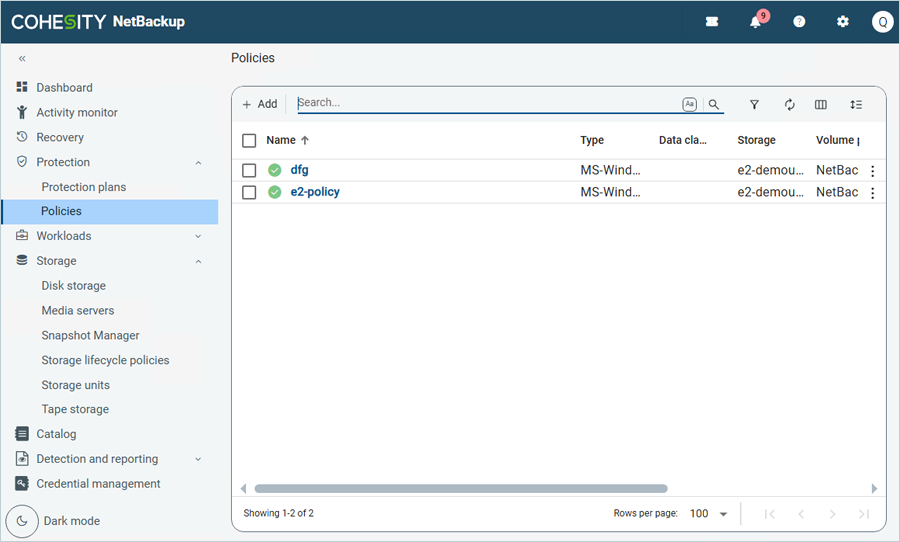
- Click Protection on the left-side menu bar and click Policies.
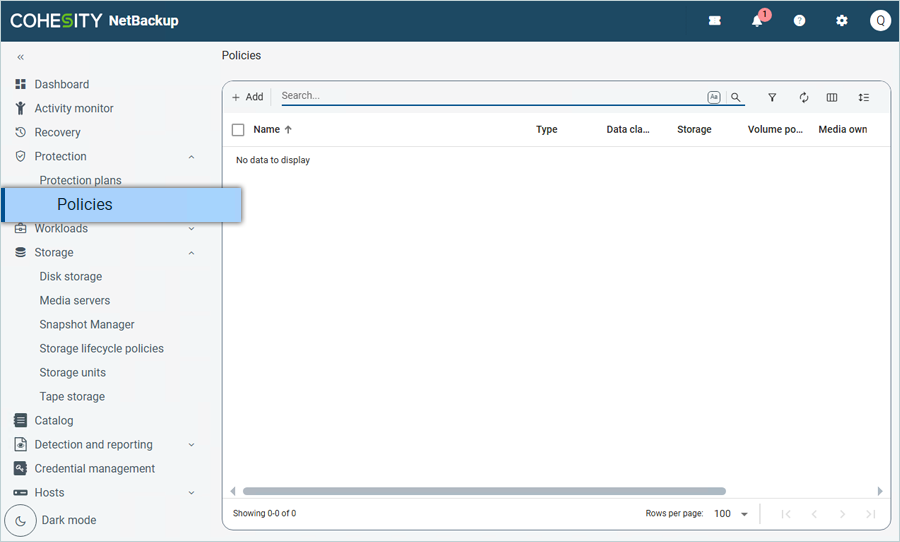
- Click Add to add a new policy in the Policies tab.
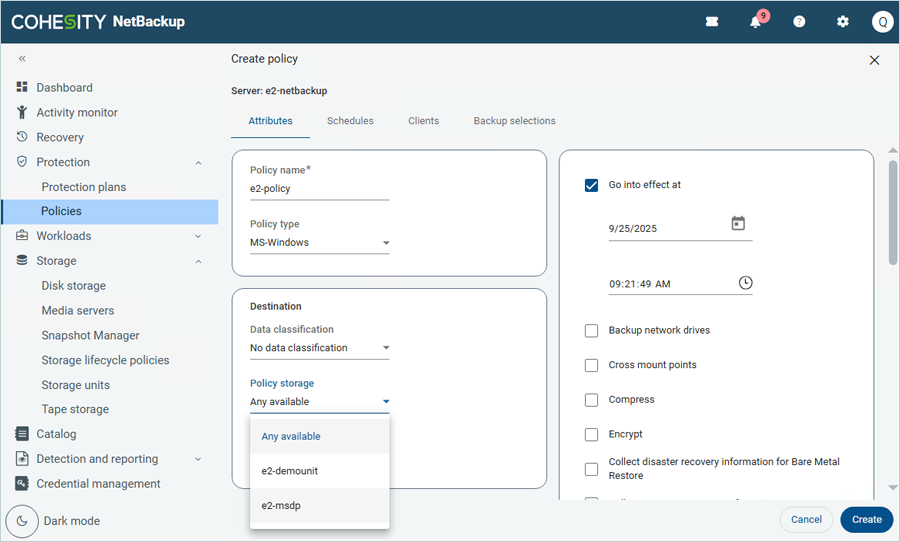
- In the Create Policy window, under Attributes
- Enter a Policy name.
- Select MS-Windows as Policy type.
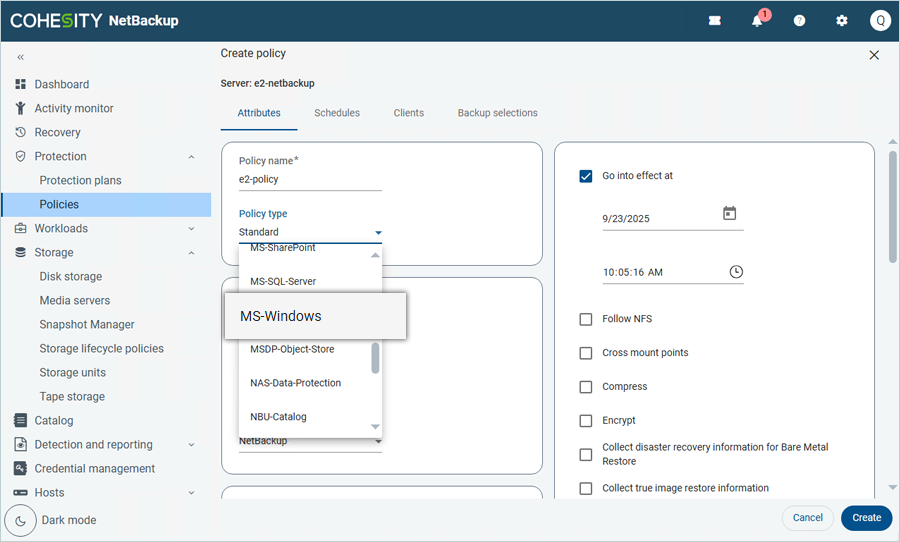
- Select your MSDP Storage server (Created in the previous step).
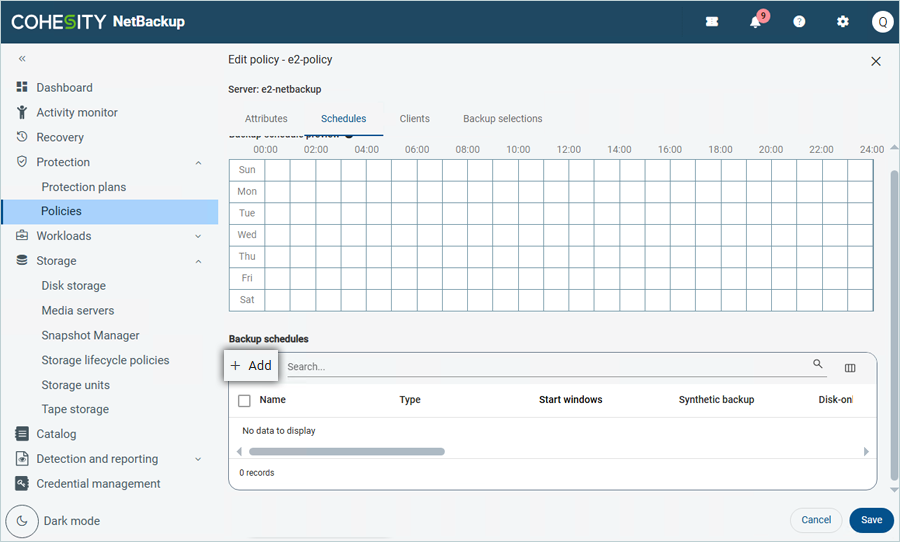
- Click the Schedules tab.
- Click Add to schedule backup.
- Enter a Name for the schedule.
- Select the Type of backup from the list (In this example, Full backup has been selected).
- Click Add.

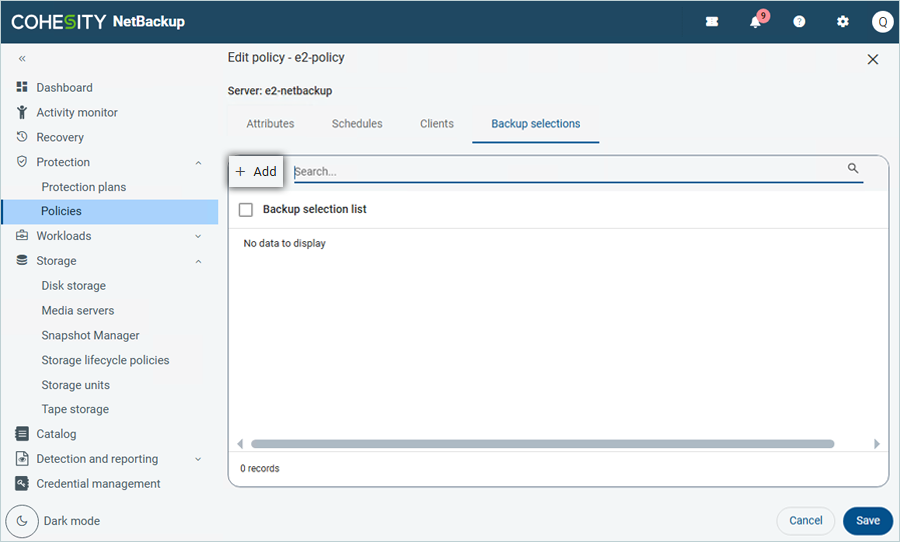
- Click Clients.
- Click Add to add the NetBackup client.
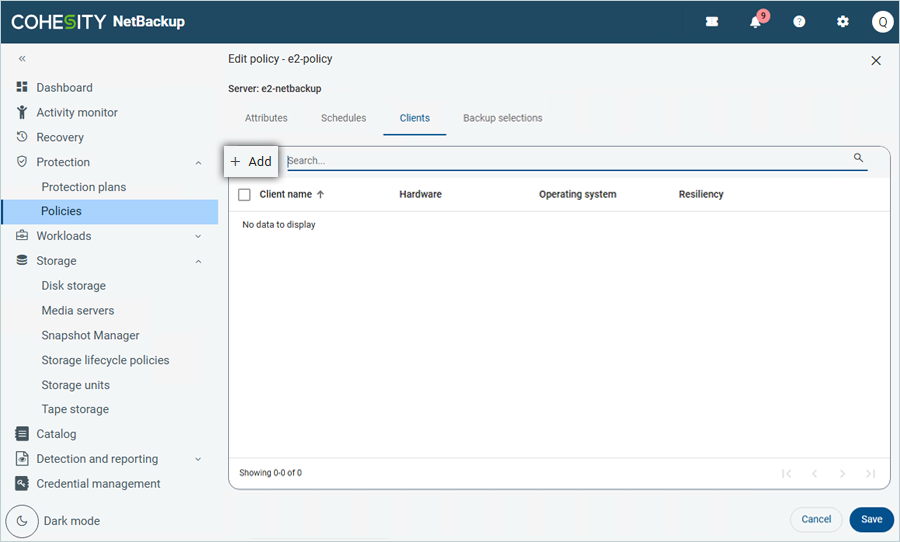
- Enter the Client name (Host name for client machine).
- Select the appropriate Hardware and operating system from the list.
- Click Add.

- Click Add to add the NetBackup client.
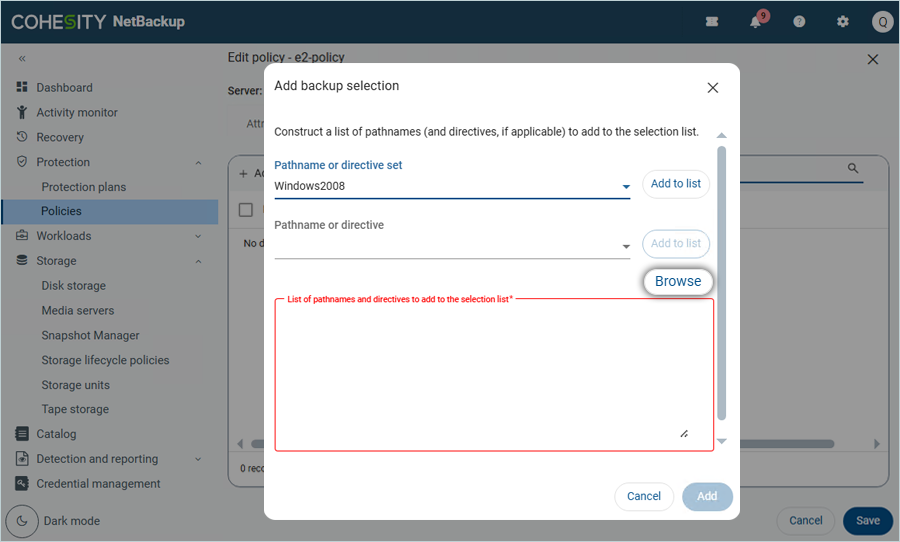
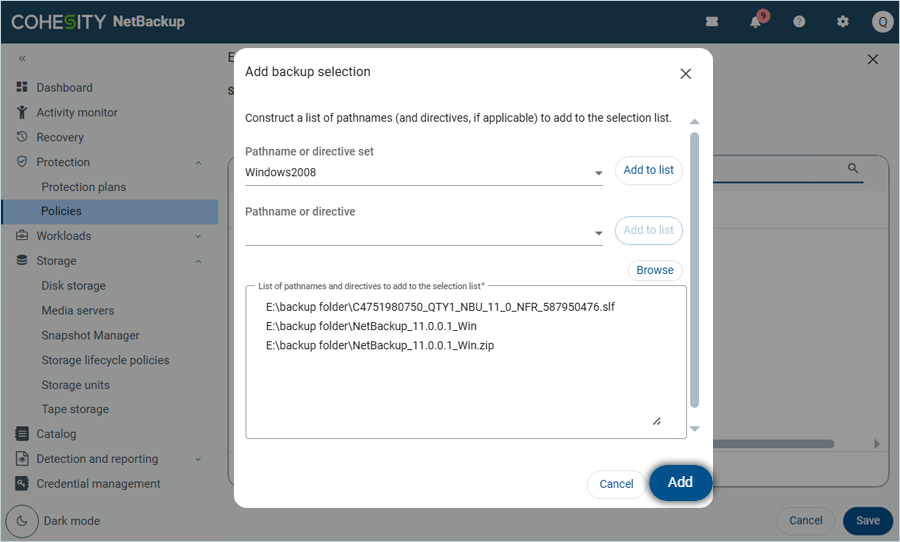
- In the Add Backup selection window,
- Select the Pathname or directive set from the list (e.g., Windows2008).
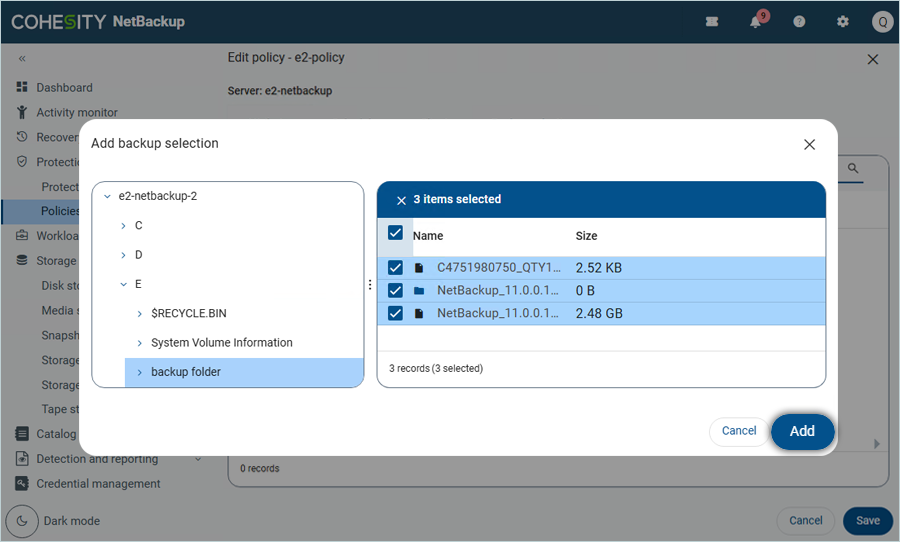
- Click Browse to select from the Client list.
- Select from the Client Storage and click Add.
- Click Add after adding pathnames.
- Click Save.
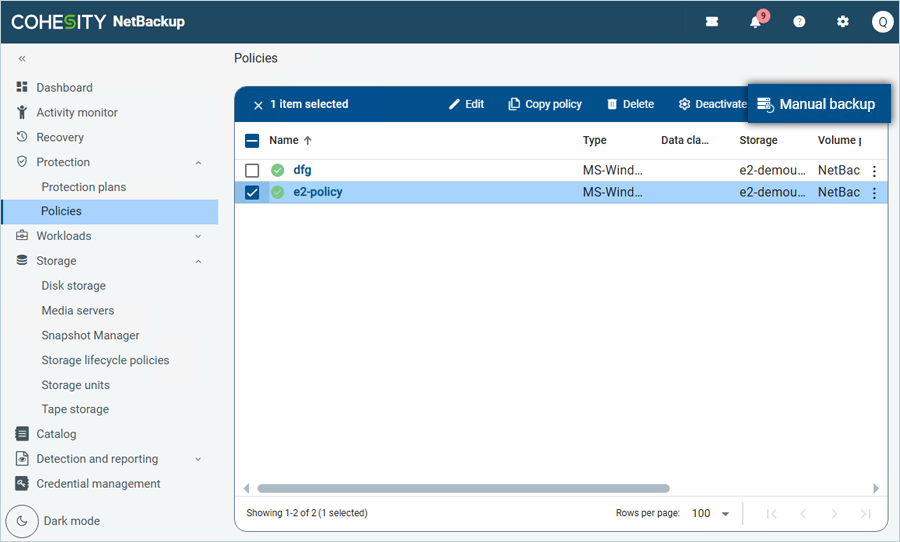
- Select the added policy by checking and clicking on Manual Backup in the top-right corner.
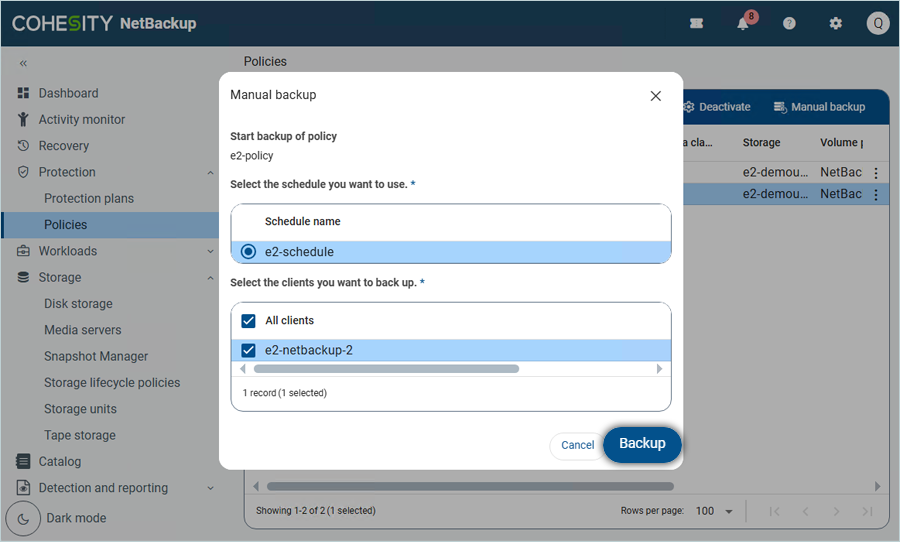
- Select both the Schedule name and the clients you want to back up, and then click Backup.
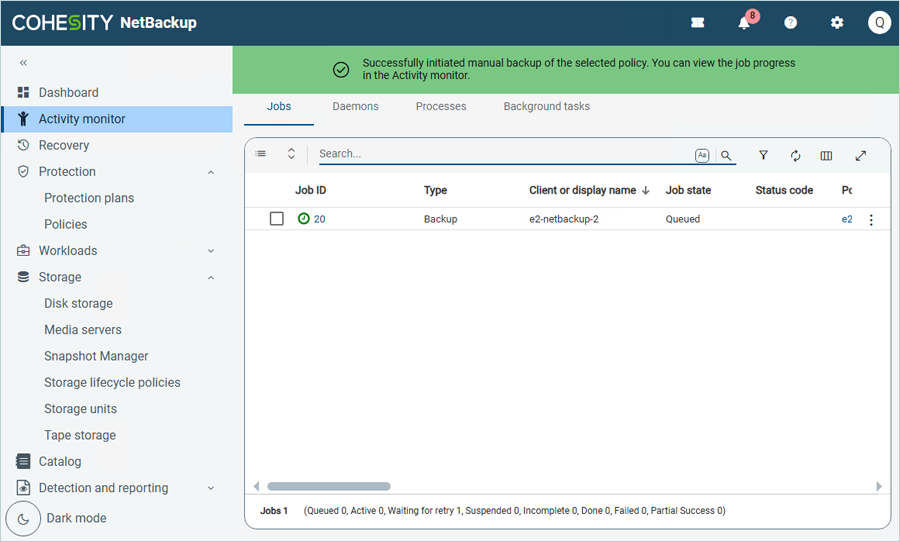
The backup has now started. Click Activity Monitor to observe the progress and status of the backup job.
Note: Data restoration is handled by your specific backup solution provider and is affected by multiple variables that are unique to your environment. For application-related enquiries/support, it is strongly recommended you seek guidance from the technical team of your backup solution provider.